• Skip to primary navigation
  • Skip to main content

Western Chandelier

  • Buying Guides
  • Styles & Trends
    • Bathroom Lights
    • Ceiling Fans
    • Ceiling Lights
    • Lamps
    • LED Lights
    • Outdoor Lights
    • Smart Lights
    • Wall Lights
  • Wellness & Safety
  • Shop Products

admin

How to Boost Your Mood with Better Lighting

How to Boost Your Mood with Better Lighting

by admin · Nov 20, 2024

Have you ever noticed how the lighting in a room can instantly influence your mood? The cozy, soft glow at an intimate candlelit dinner. The bright, energizing lights in a busy office or retail store. The warm, intense sunlight at a photographer’s golden hour photo shoot. The dust-specked bluish beam of light coming through your window on a cloudy day. 

Light plays a big role in shaping our emotions, mood, productivity, and well-being. In this article, we’ll explore more about how lighting and mood are related, and how you can use light to feel your absolute best.

Feeling Tired? The Science of Light and Sleep

Imagine waking up to a vivid sunrise, feeling invigorated, motivated, and ready to conquer the day. This comes from light’s impact on our internal body clock, known as the circadian rhythm. The natural light we are exposed to during the day helps regulate our sleep-wake patterns and, in turn, our mood and energy levels. In the mornings, sunlight has a cool, almost bluish hue. At midday, sunlight is a truer white. In the evenings, sunlight has warm, almost orange hue. This transition from cool to warm throughout the day is hardwired into our brains – and helps our body know when its time to wake up, and when it’s time to get ready for bed.

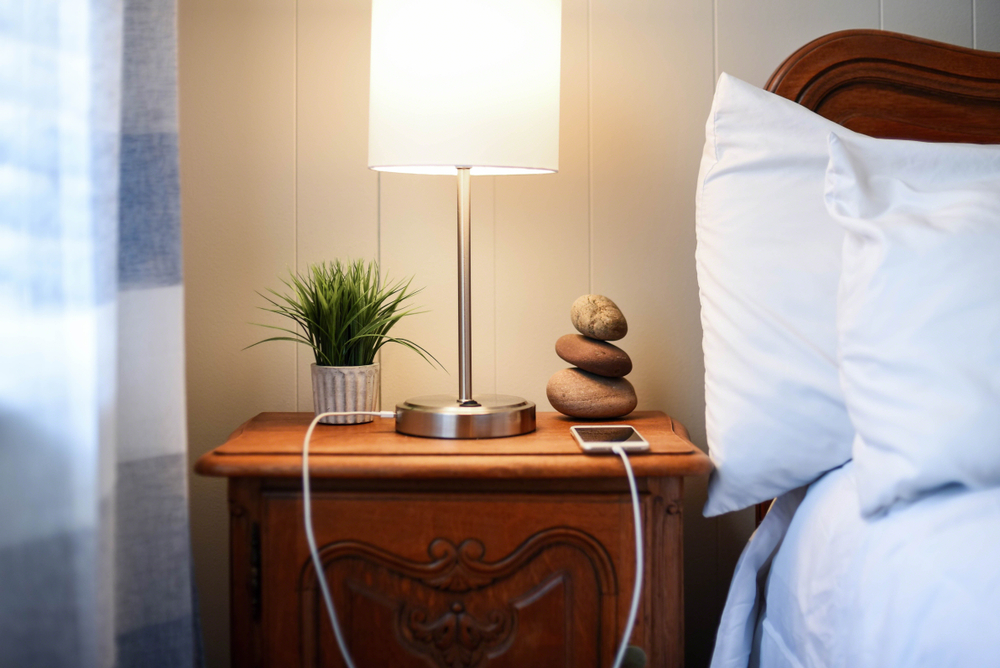
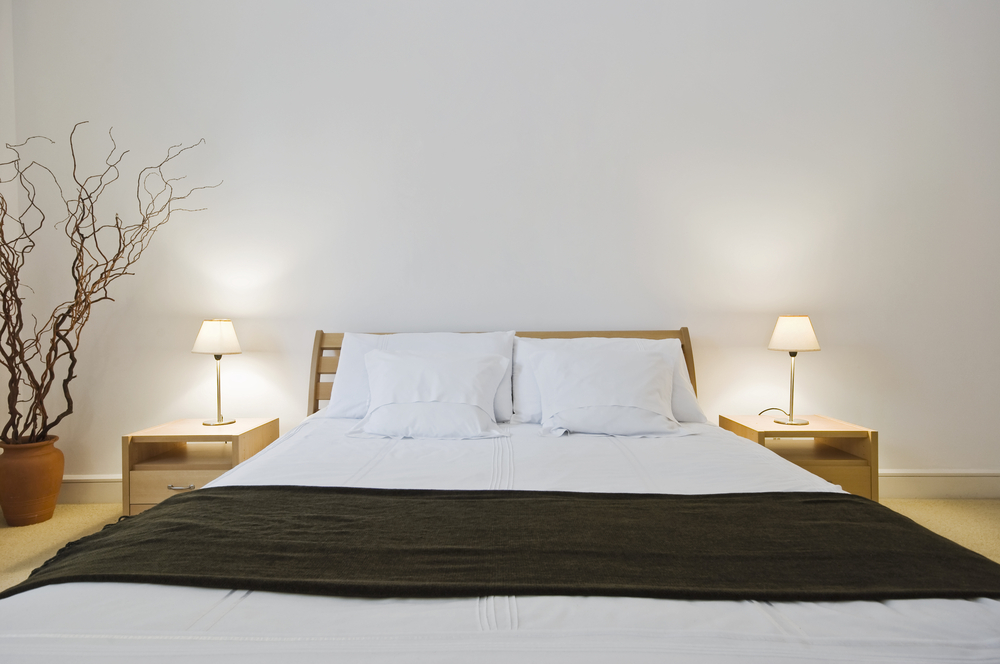
Artificial lighting, if properly aligned with our circadian rhythms, can mimic the many benefits of natural light. This is important since the majority of us spend much of our waking hours indoors under various types of artificial light. The most important thing to remember if you want a good night’s sleep, is to avoid light sources that give off cool, blue light for a couple of hours before bed. This “morning” light will trick your brain, and inhibit melatonin production making it harder to get to sleep. Use light bulbs with warmer light in your bedroom, and turn off the screens (phones and tvs give off blue light too!). Nothing boosts your mood faster than a good night’s sleep!

Feeling Down? The Science of Lighting and Mood

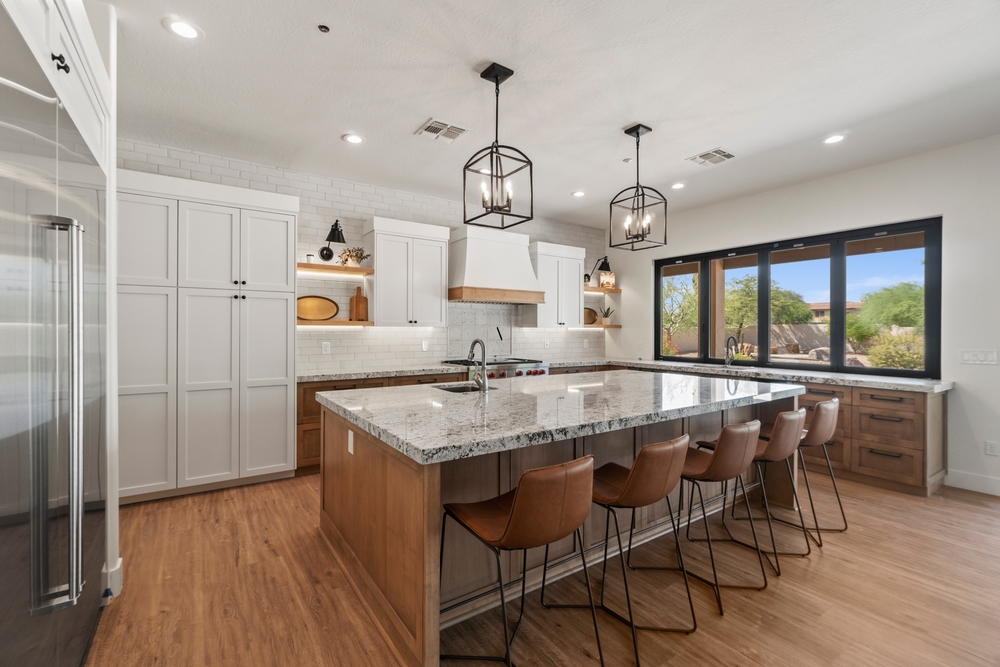
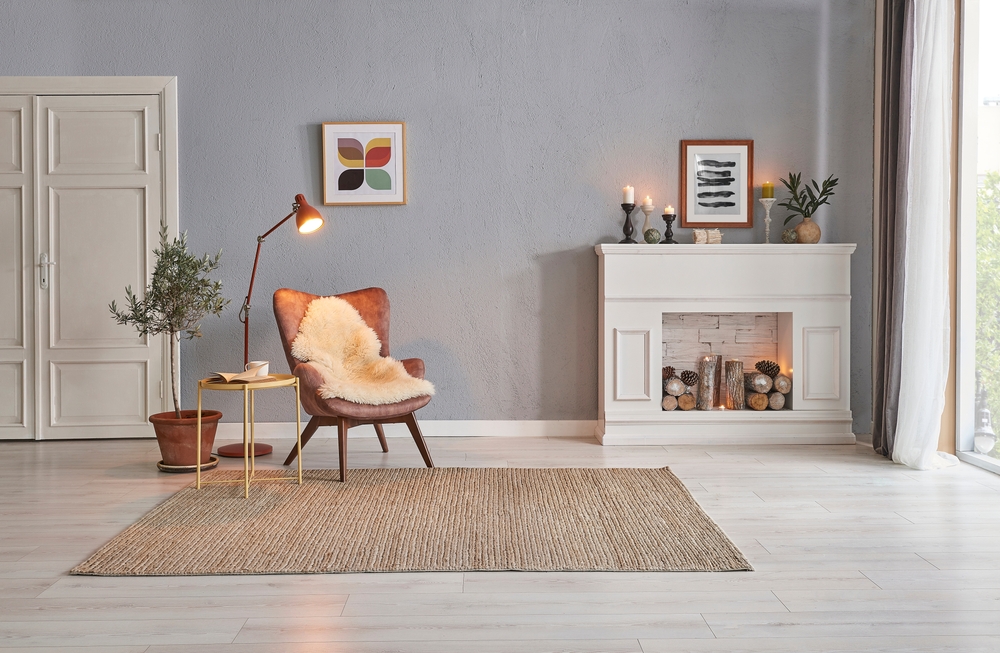
Sunlight is the gold standard for lighting. Natural sunlight influences mood by releasing and regulating different hormones and chemicals in our bodies, including melatonin and serotonin. Maximizing exposure to natural light in your living and work spaces is proven to have a positive impact on your mood. Studies have shown a strong link between exposure to sunlight and a boosted mood. Exposure to bright, natural, or natural-like lighting is linked to reduced symptoms of depression and improved mood. While sunlight isn’t necessarily a cure for low mood – making time to be in it can certainly help you to feel a little less down, especially during those darker winter months that can trigger seasonal depression. 

Natural lighting isn’t always available, of course, and this is where artificial light comes in to save the day! Just as the temperature of light can affect your sleep cycle, it also plays a part in your mood and the emotions you feel. Warm light (yellow and orange hues) creates a cozy, inviting atmosphere and increases relaxation and comfort. Cool light (bluish tones) is energizing and can promote focus and alertness. Generally, the goal is to balance warm and cool lighting to cater to different settings and activities.

How to Choose the Right Light:

Lighting at Home

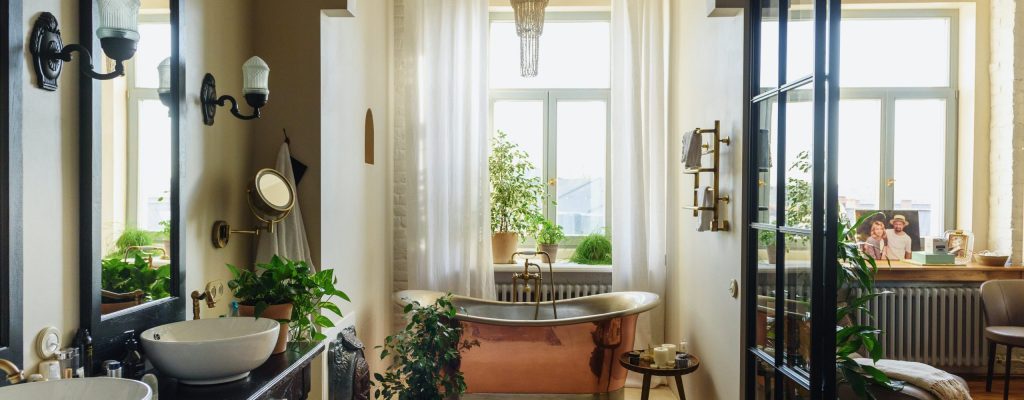
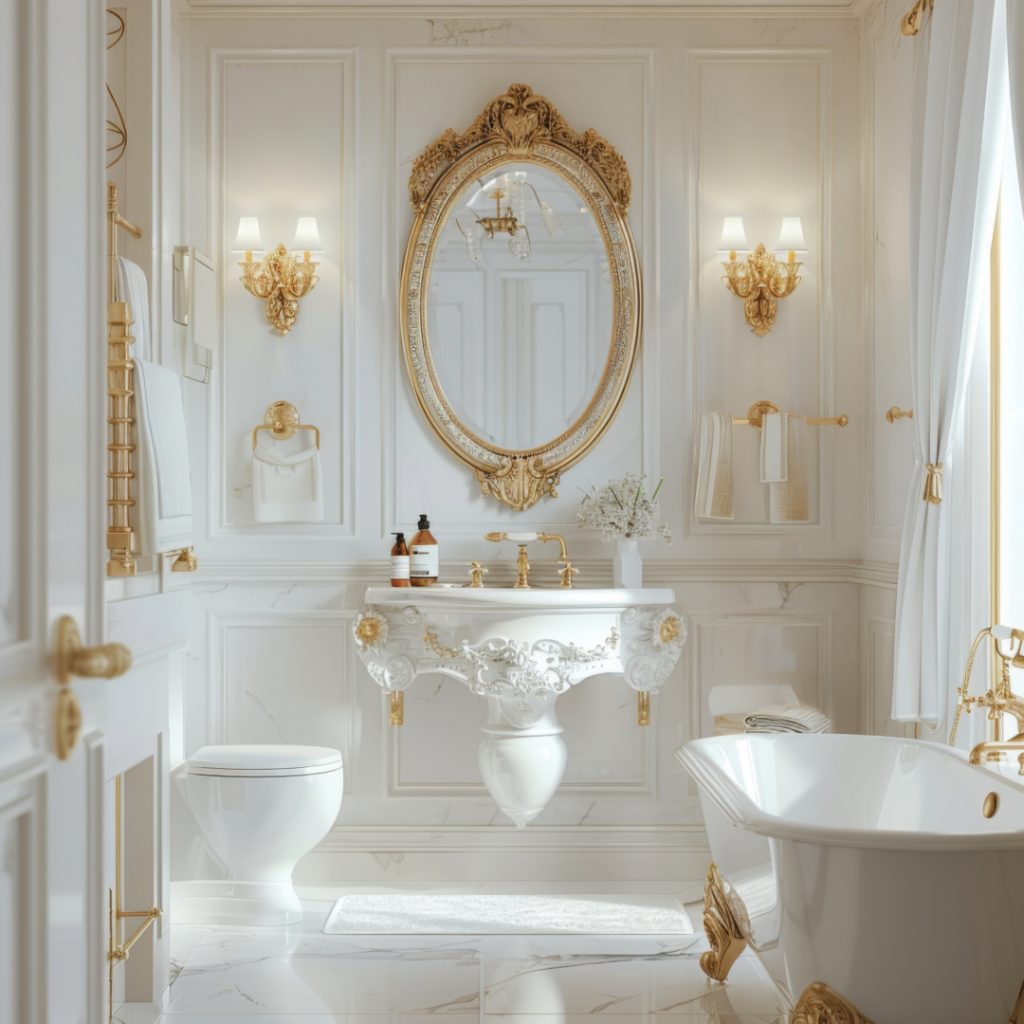
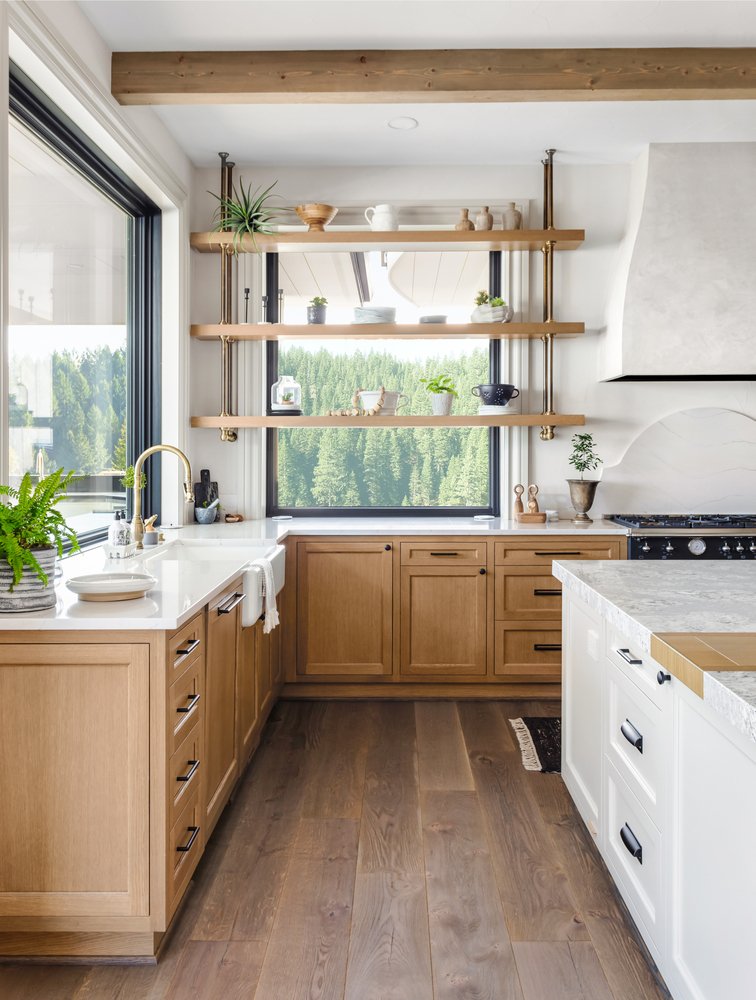
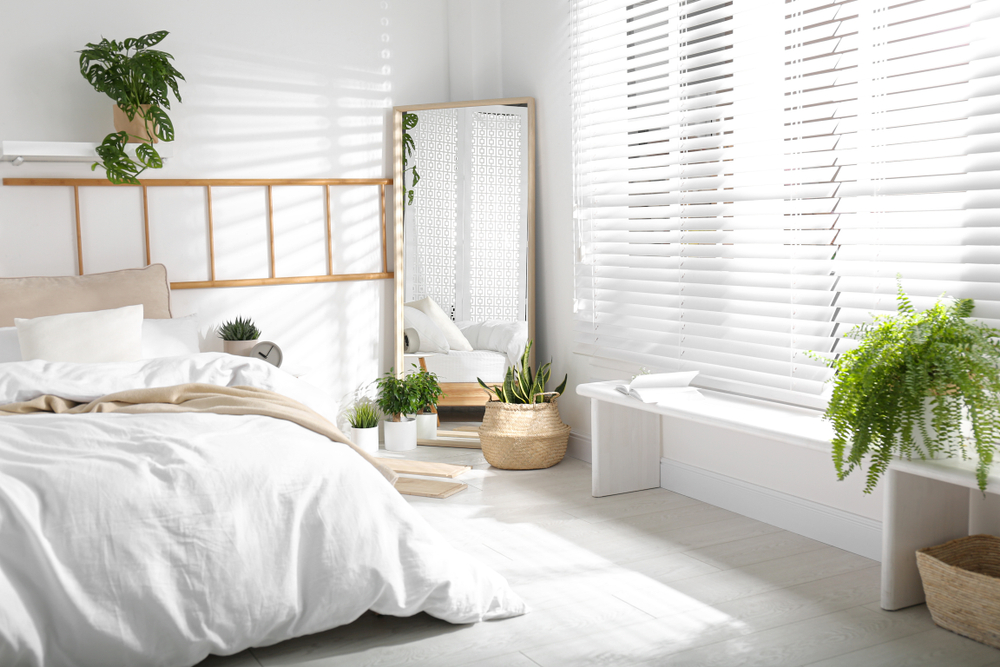
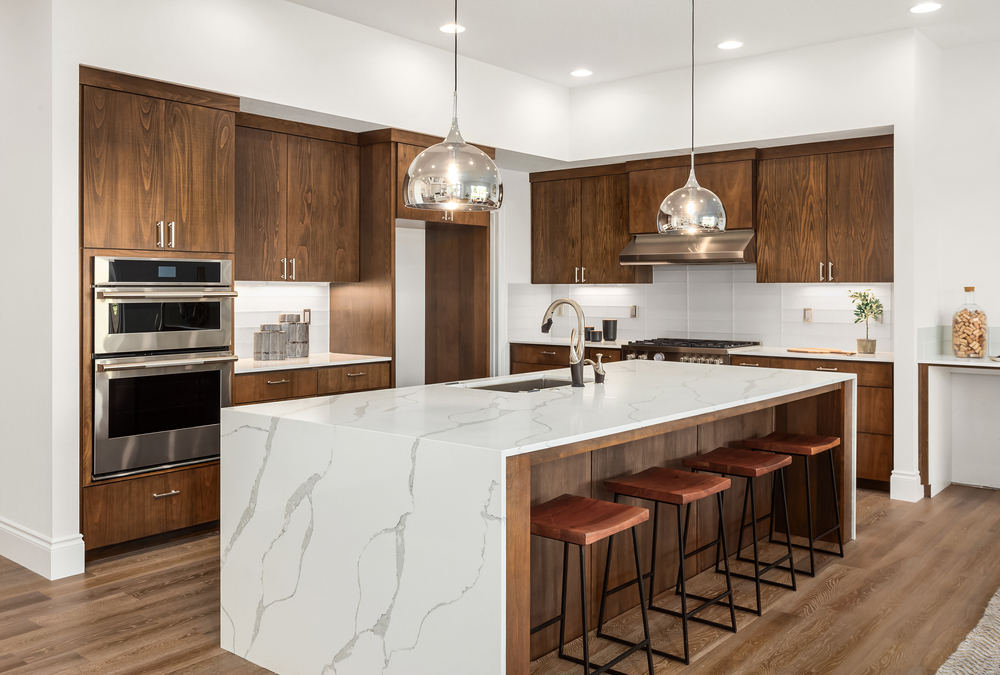
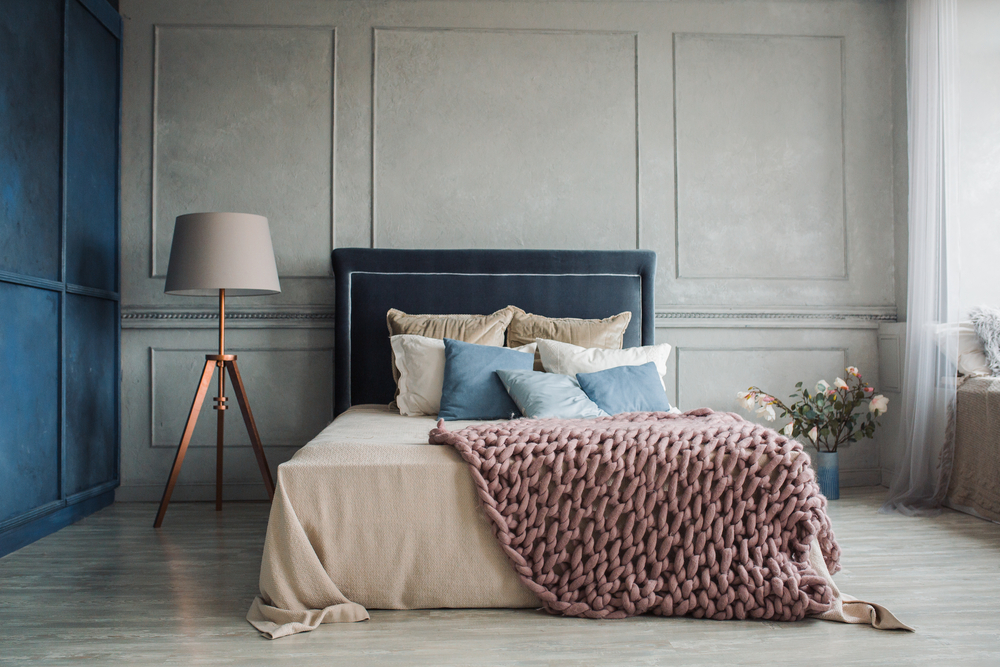
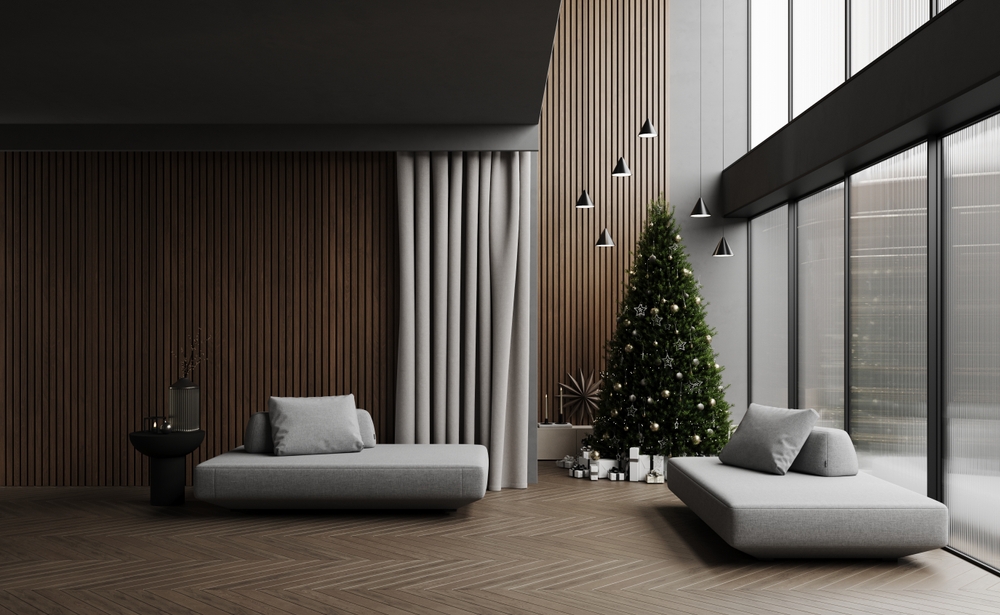
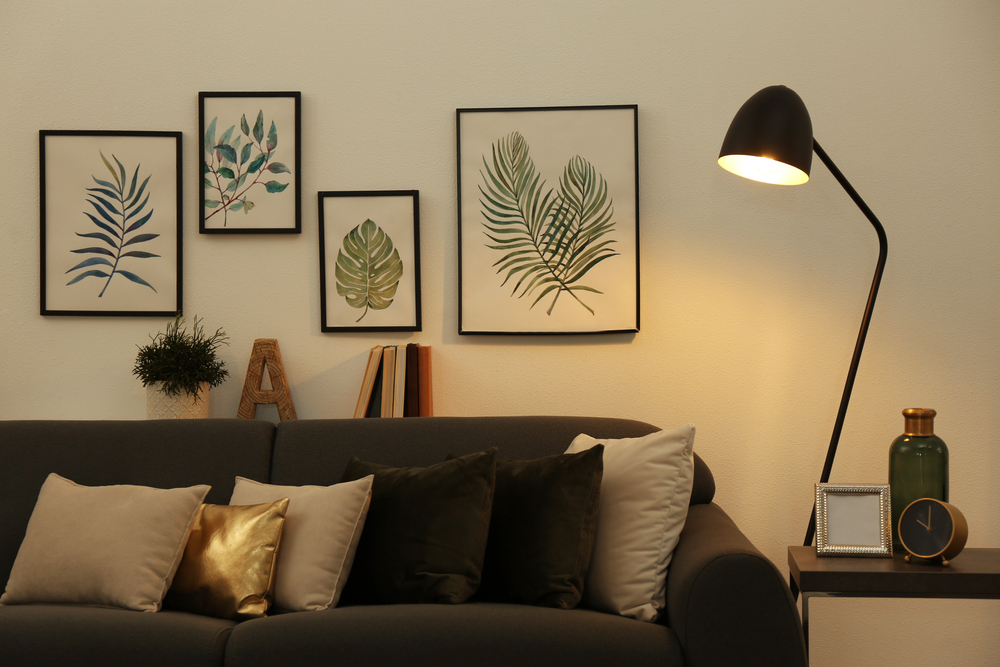
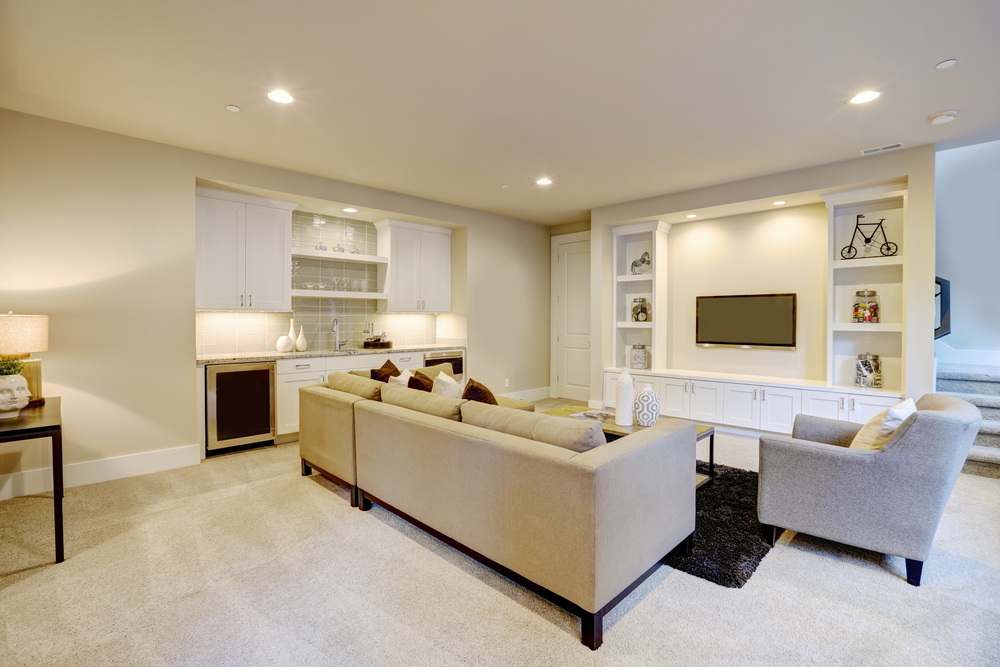
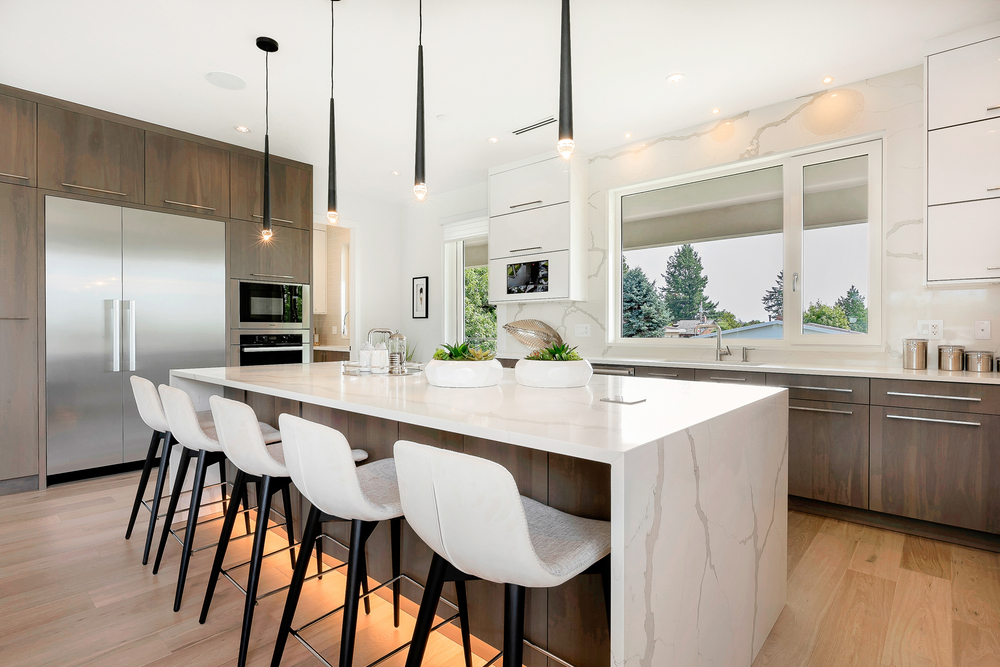
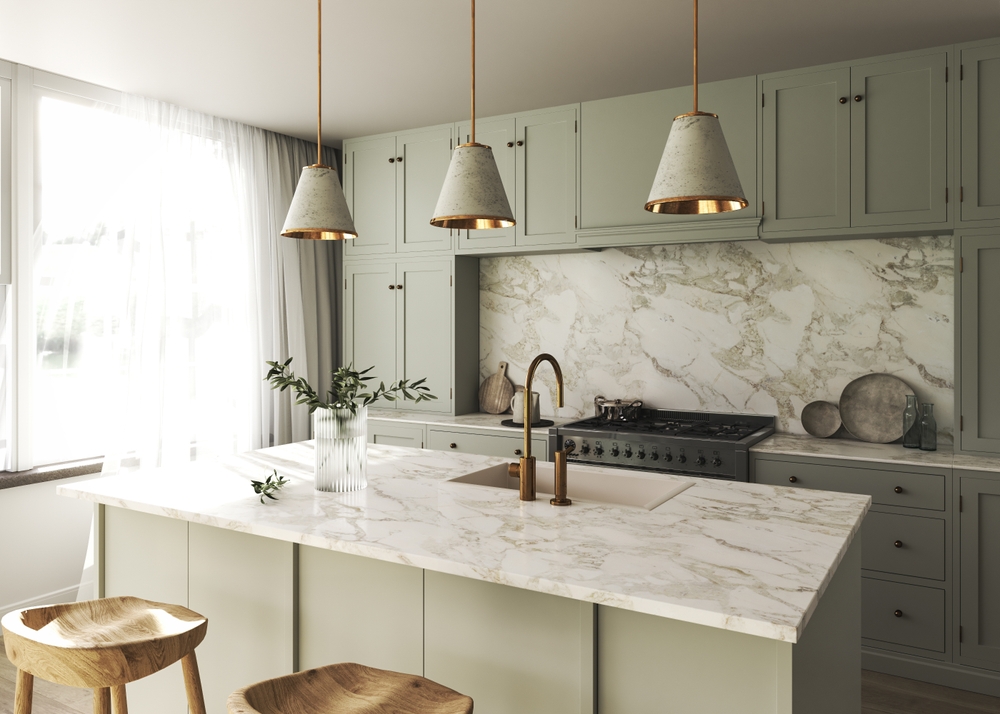
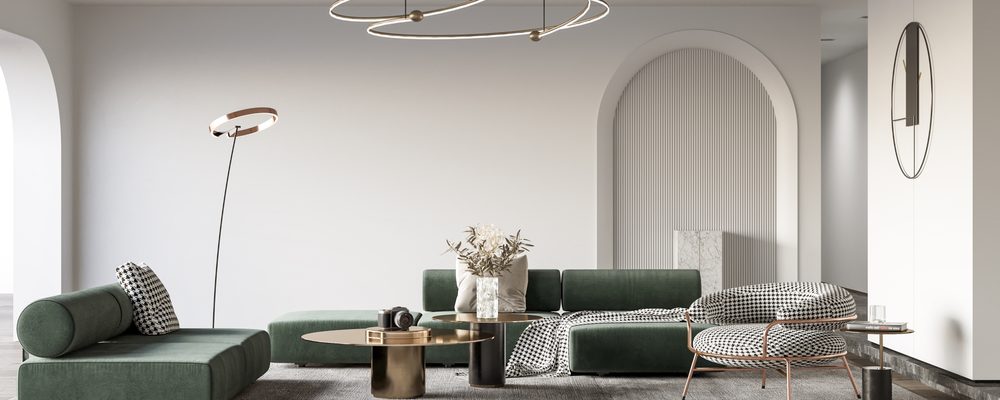
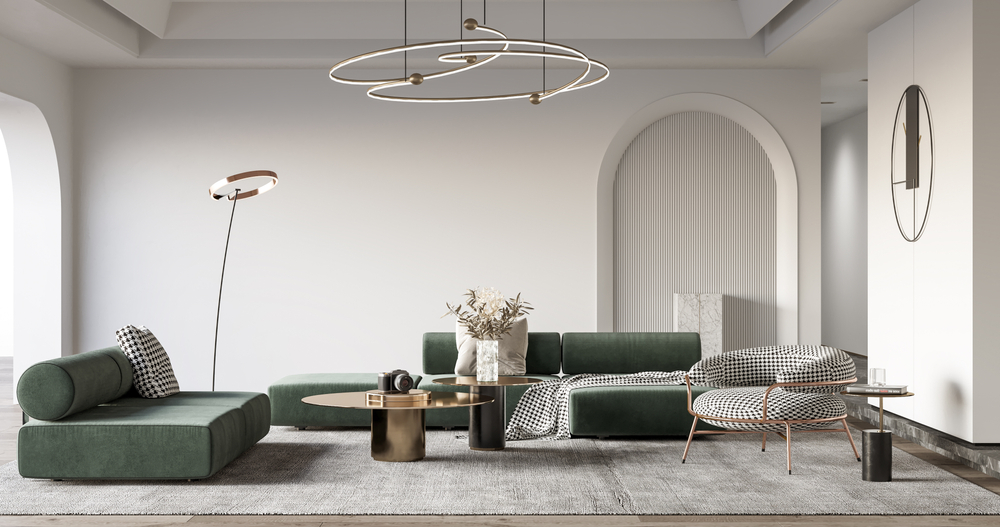
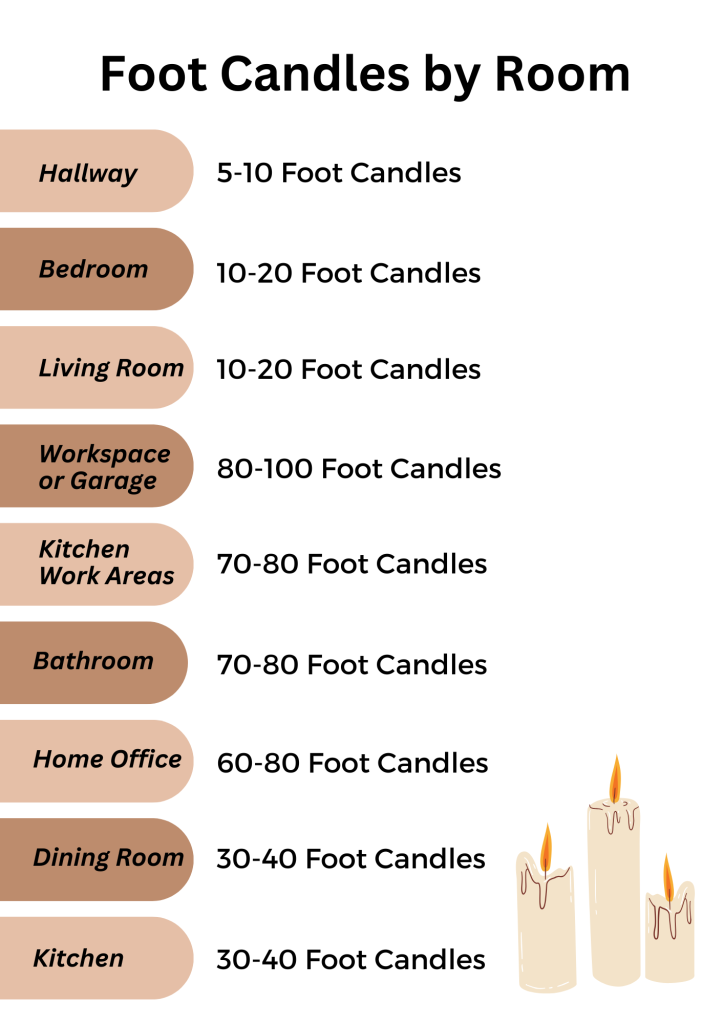
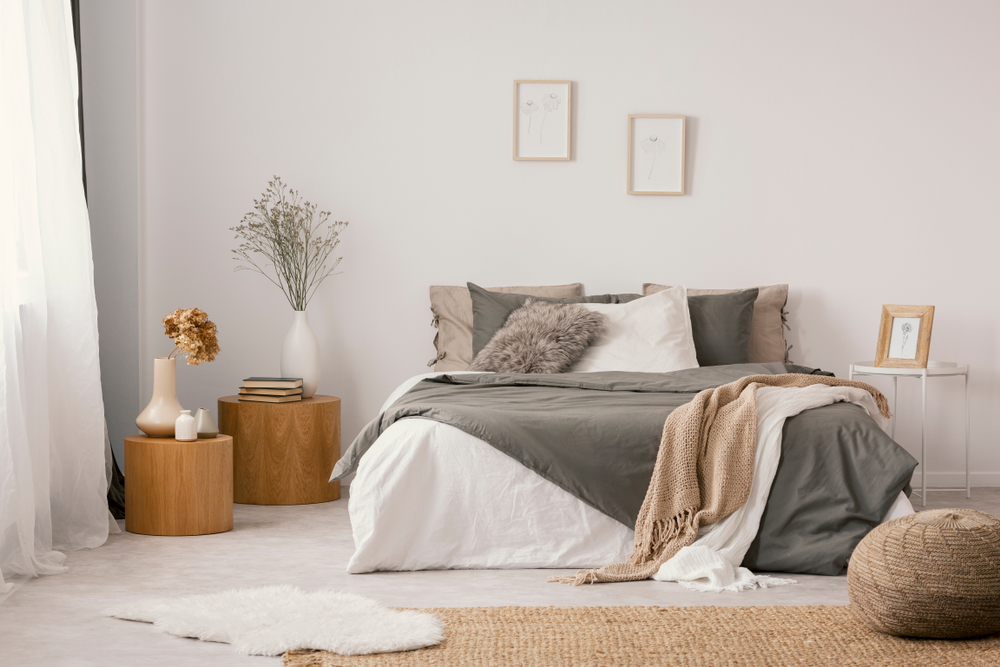
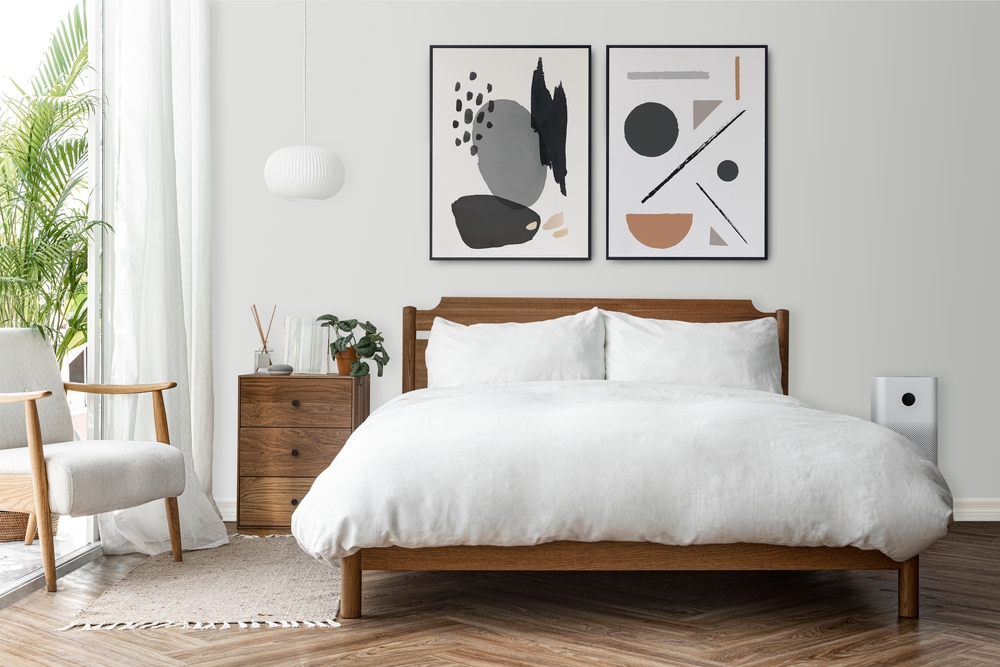
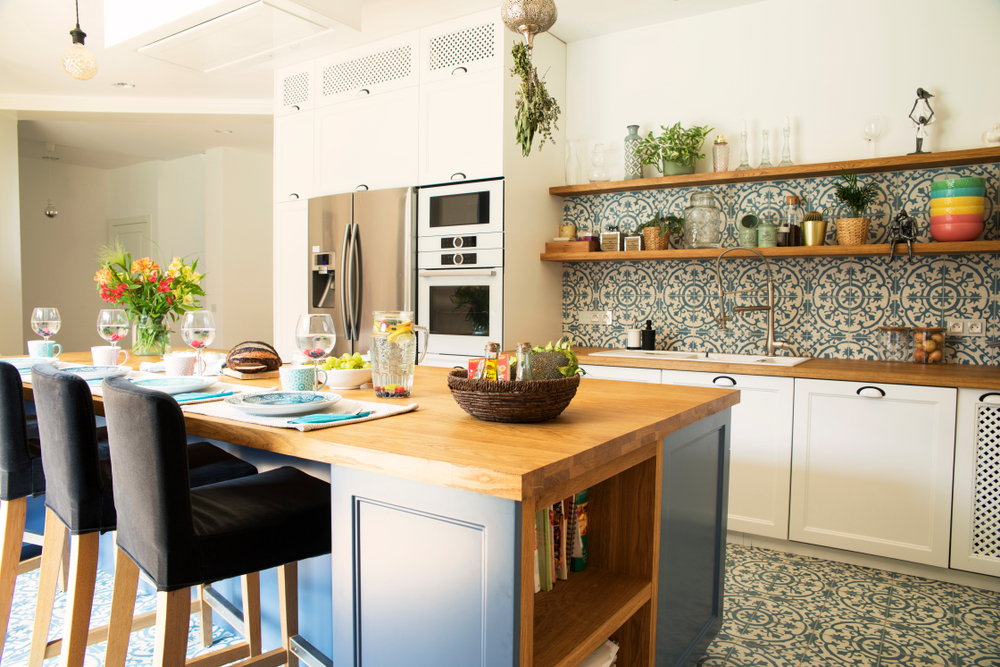
Lighting in your home is about more than just practicality. Lighting helps you create a space that is welcoming and supports your emotional well-being. Your home is your safe space and your sanctuary. Soft, warm lighting in living spaces and bedrooms creates a sense of relaxation and tranquility. Dimming lights in the evening can tell the body to unwind, supporting better sleep. In contrast, bright, cool lights are incredibly helpful in areas where you need to stay focused and alert, like a kitchen food prep counter, a garage workshop, or a home office. 

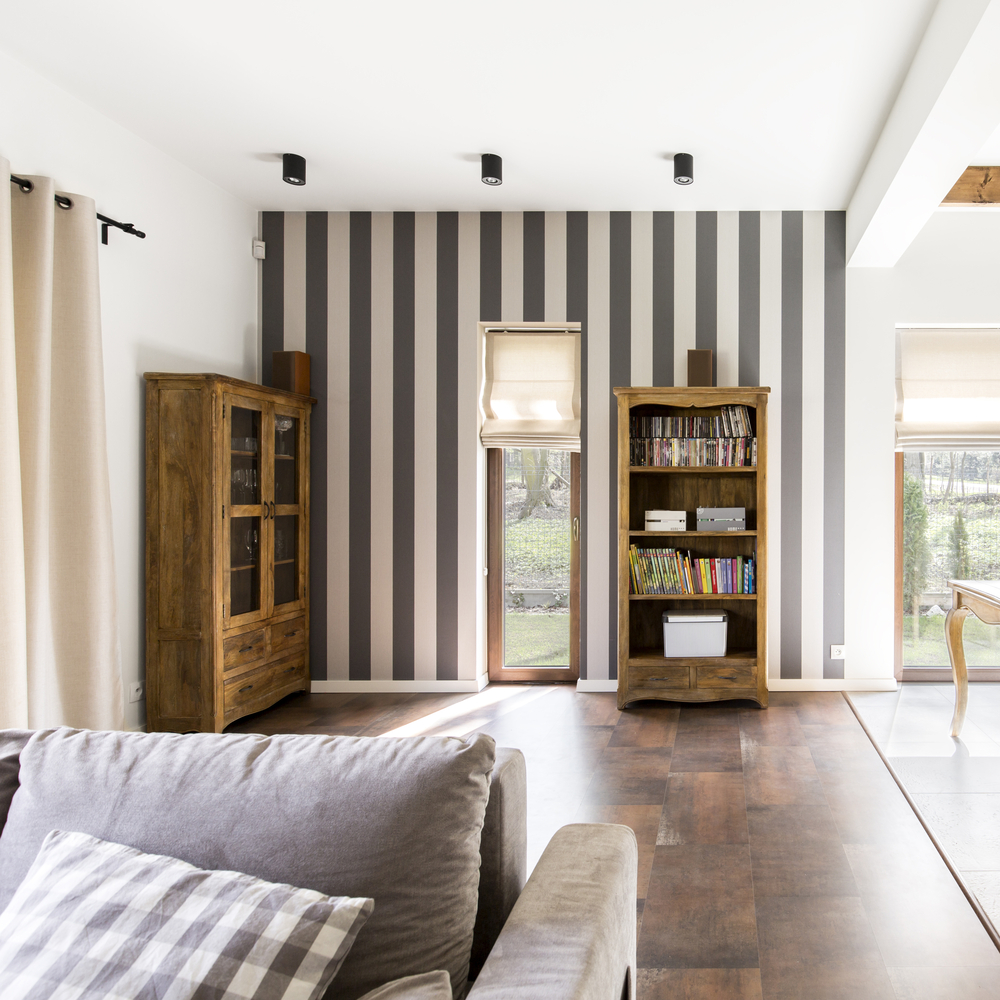
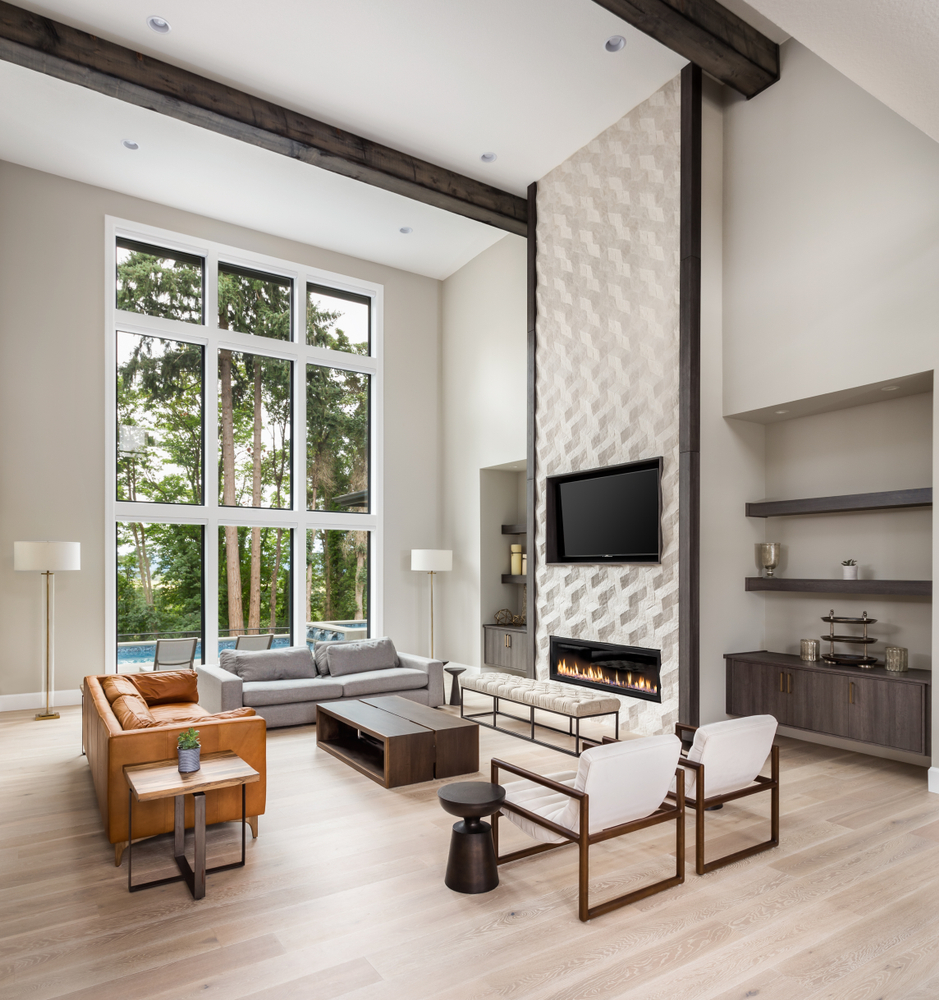
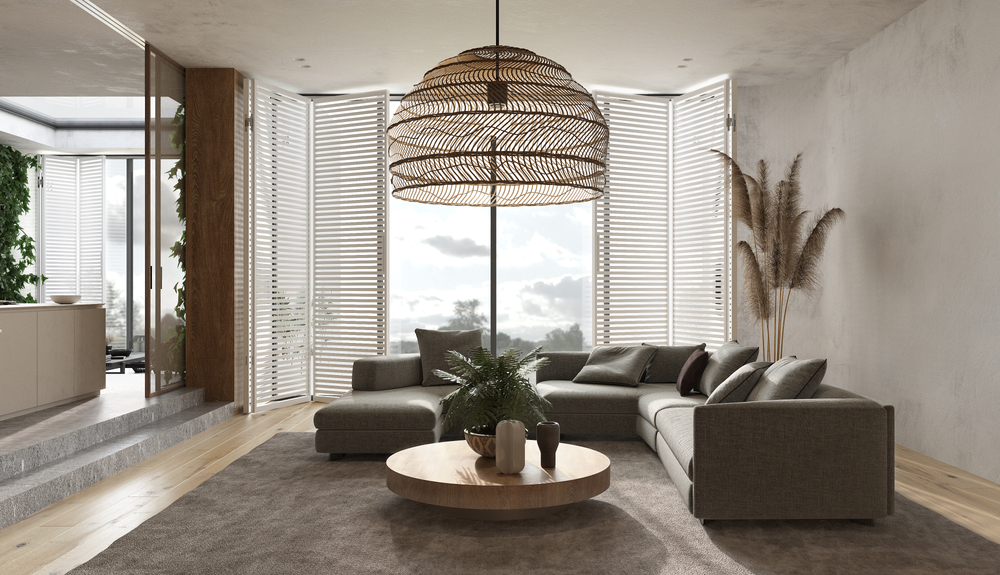
In multi-use spaces, it’s especially important to layer your light. For example, a large great room with layered light could have cool white recessed lights in the ceiling on a dimmer switch, a large window with blinds for natural light, and lamps placed in strategic areas with warmer bulbs. By adjusting light levels and sources, you’ll be able to create a mix that feels right for any activity, and transition seamlessly from homework at the kitchen table to a movie night in the living room. 

In outdoor areas, like a patio or yard, opt for warm lights to create a comfortable, cozy atmosphere for your late-night BBQs. Cool lights work well for security lights, or for areas where you need to see clearly to be safe, like stairs or a walking path with uneven levels, a basketball court, grilling area, or storage shed. Whenever possible, choose fixtures that direct light downward to prevent light pollution – the best night lights around are the stars! 

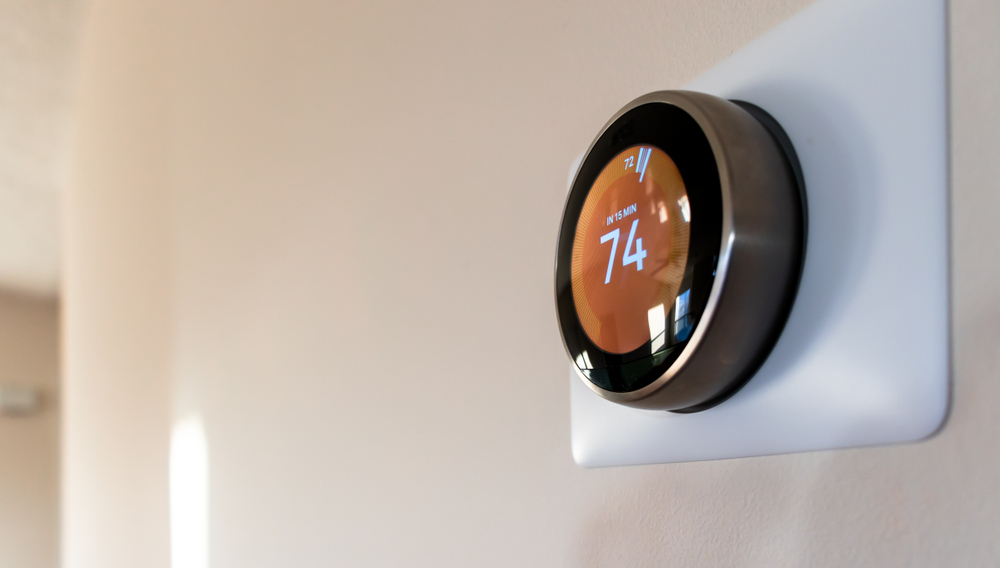
Pro Tip: You may want to consider investing in smart LED bulbs. While they cost more upfront, they are incredibly energy efficient (meaning a lower power bill), and many can be either manually adjusted or programmed on a timer to go from cool to warm light throughout the day.

Lighting at Work

As a general rule, bright, cool lighting in workplaces can improve productivity and concentration. Research suggests that daylight-like lighting in office settings enhances job satisfaction and reduces fatigue. In addition, incorporating warm lighting in break areas can reduce stress by creating a more relaxing space for employees. Always remember to keep your employee’s needs in mind, and whenever possible ask for feedback. For example, fluorescent lighting ticks the boxes for bright and cool, but it can also cause headaches. An office workspace in a high-stress industry might do well with cool light (to boost productivity) OR warm light (to ease stress levels), depending on the needs of the people that will be in that space.

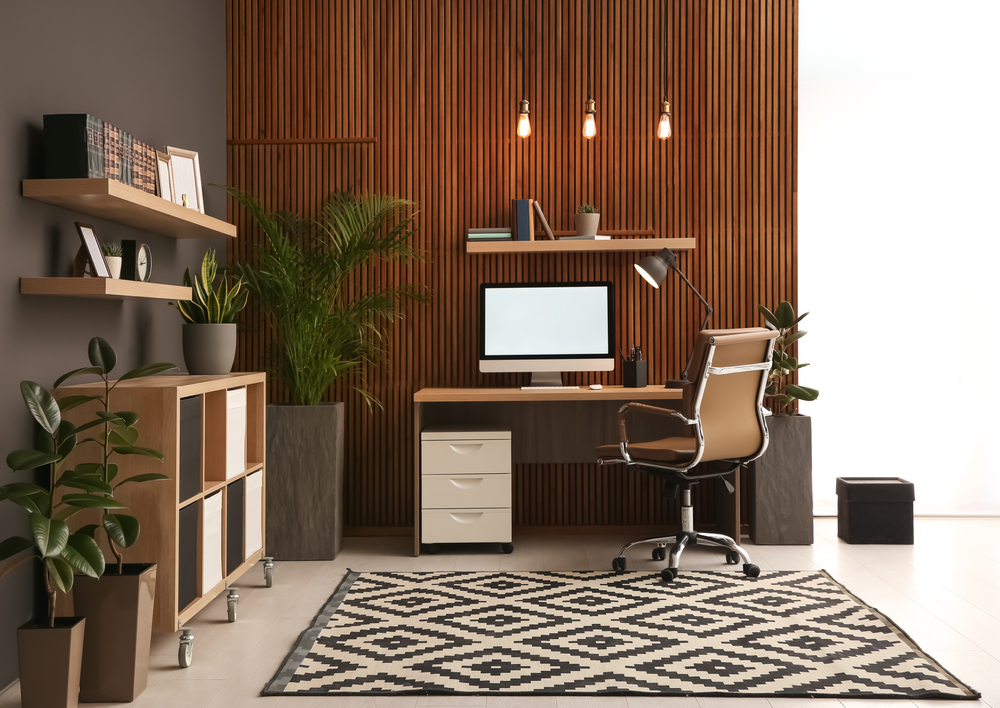
If you work from home, the same principles can be applied to your home office. Make sure your office has plenty of cool, bright light for those days when you need to be laser focused. Add in a warmer light source like a desk lamp for stressful days or late-night work marathons.

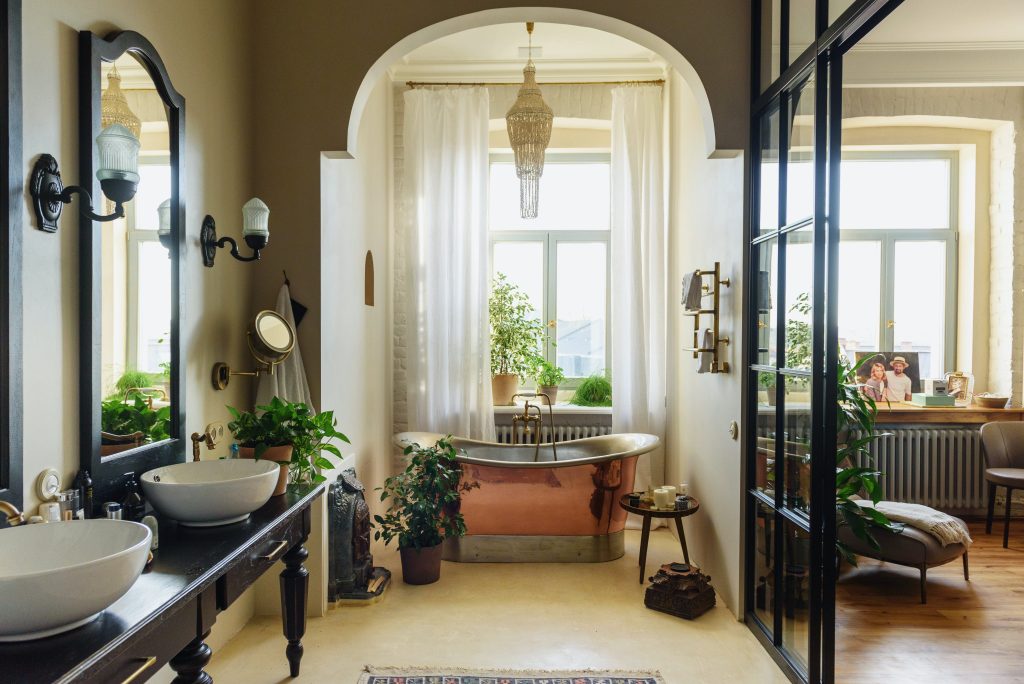
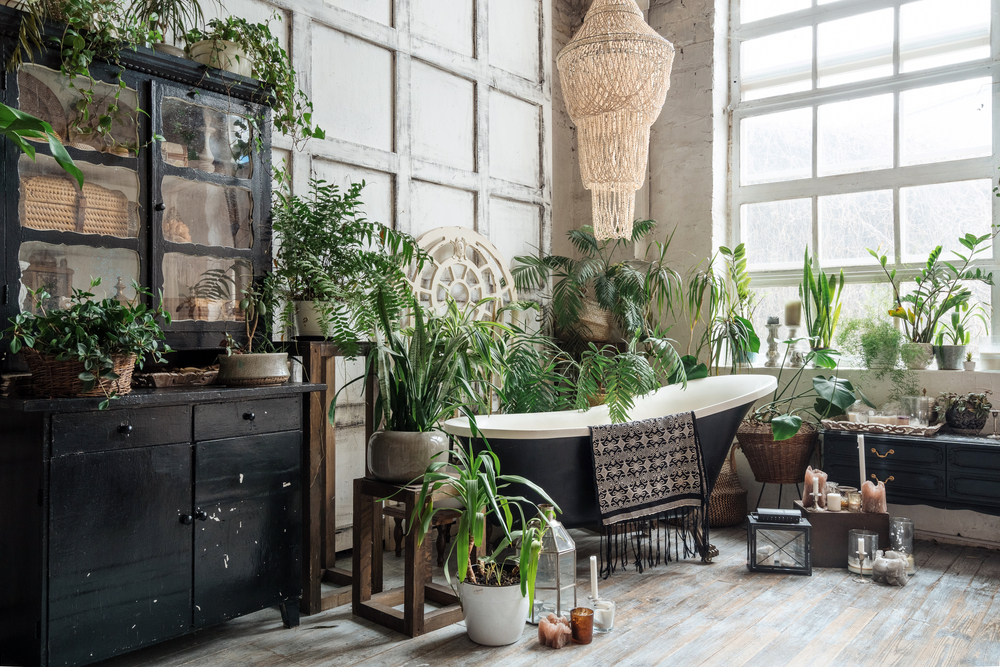
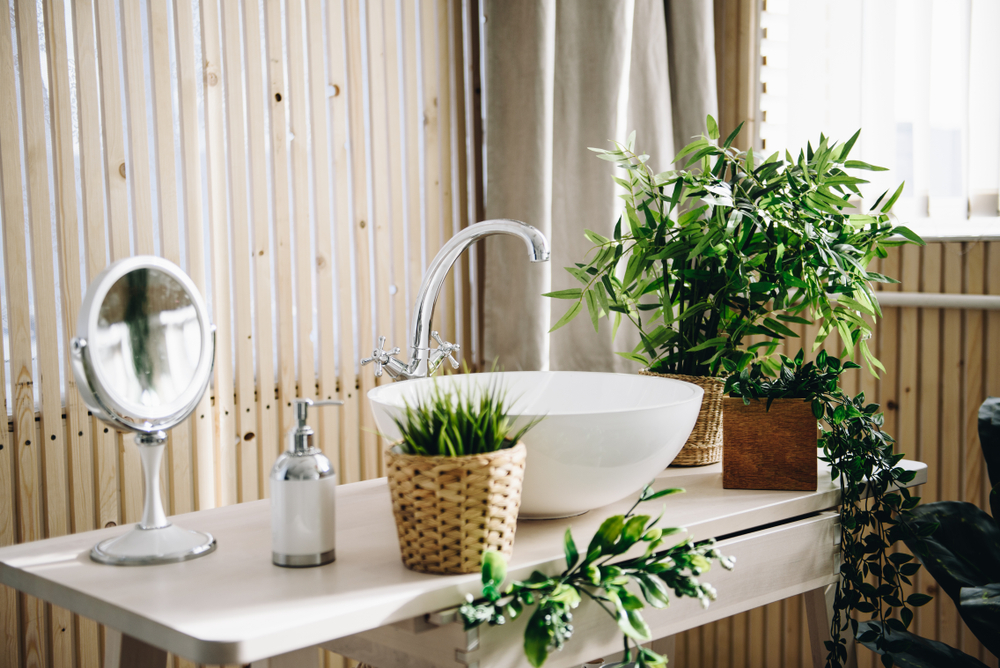
Pro Tip: Another proven mood-booster in the workspace is the addition of plants. Find varieties that will flourish with the lighting conditions in your space, and add a few around the office.

Creating Your Ideal Lighting Environment:

  • Know Your Needs – Figure out the main purpose of each space, and determine how you need to feel while you’re there. Tailor the lighting accordingly to ensure the space will meet your mental and emotional needs while you complete tasks in the area.
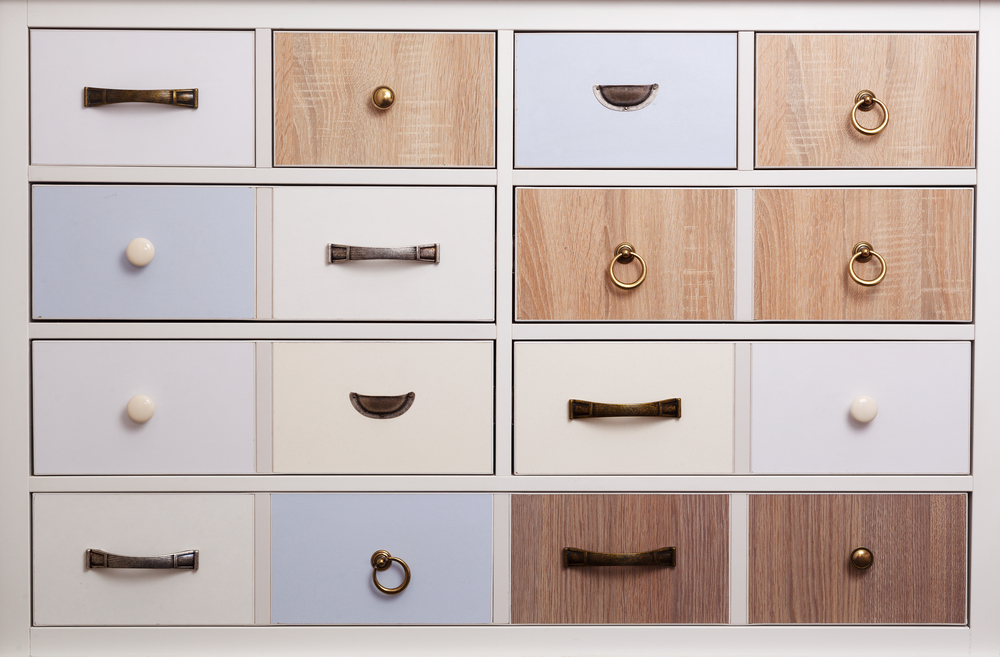
  • Choose the Right Bulbs – Light bulb tech has come a long way. Choose bulbs with color temperatures that match your goals, or invest in smart lighting systems that allow you to change your lighting settings throughout the day as your needs change. Remember to be flexible, you might end up trying a couple different light temperatures before you find the best one. 
  • Use Dimmers and Controls –  Whenever possible, install dimmers to control the intensity of your lighting. Adjusting the lighting levels can help you create the desired ambiance for any occasion and “set the mood” to help improve your mood!  
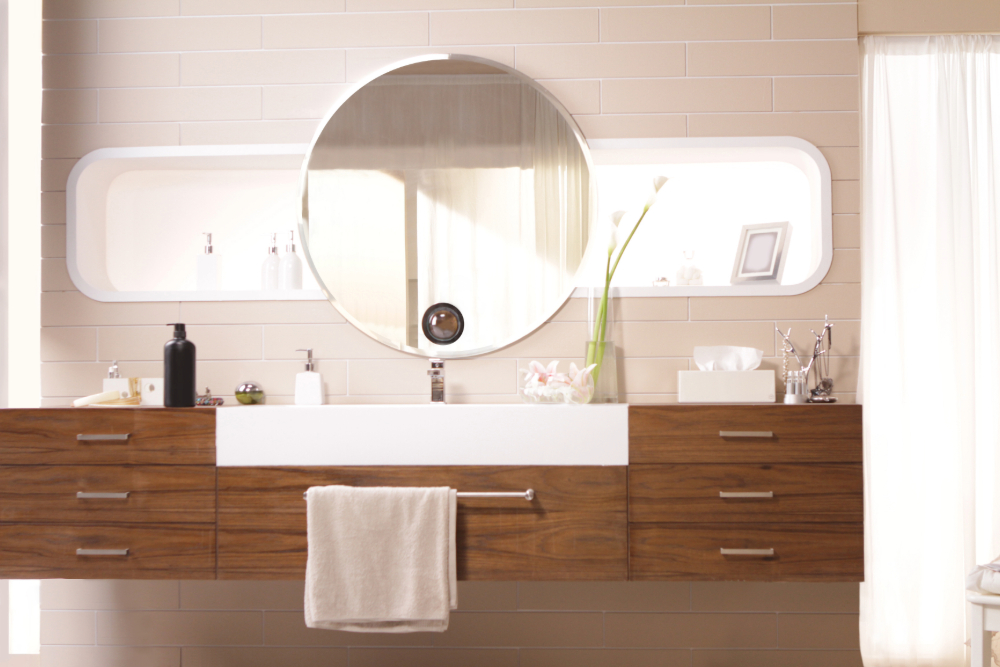
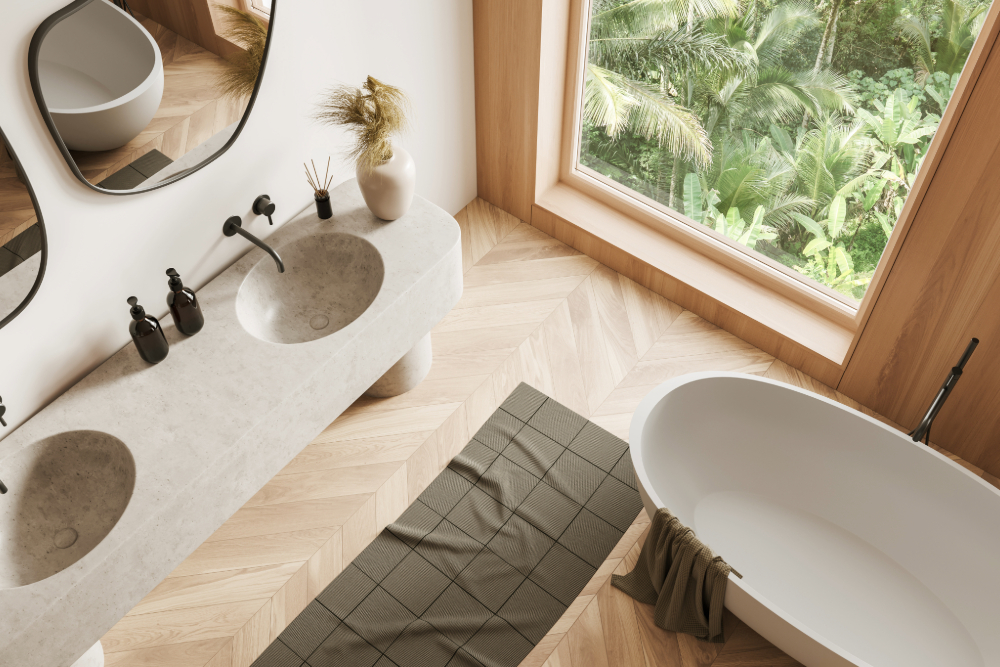
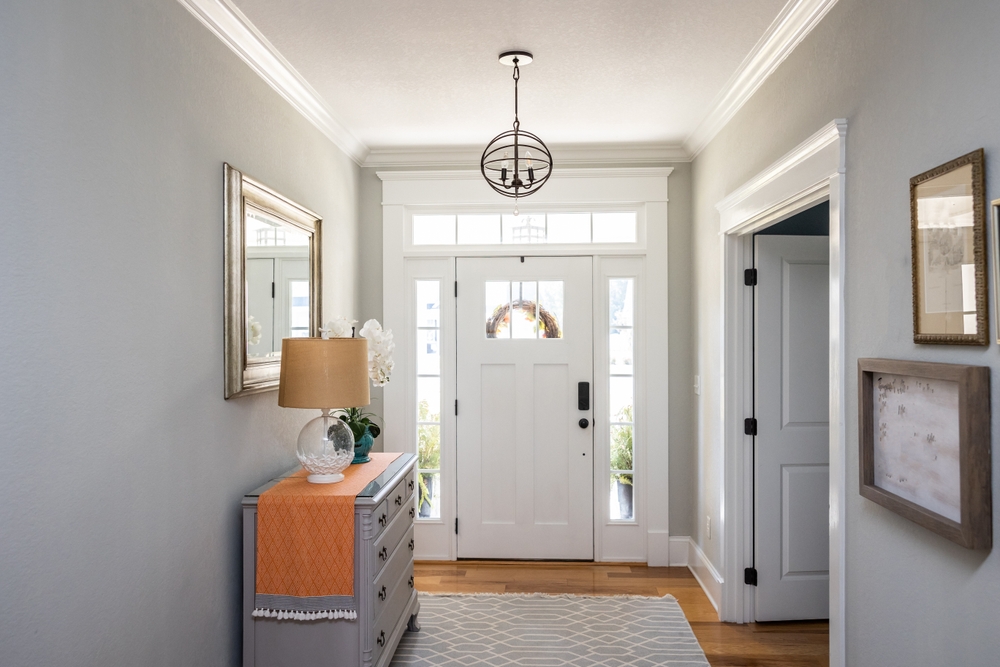
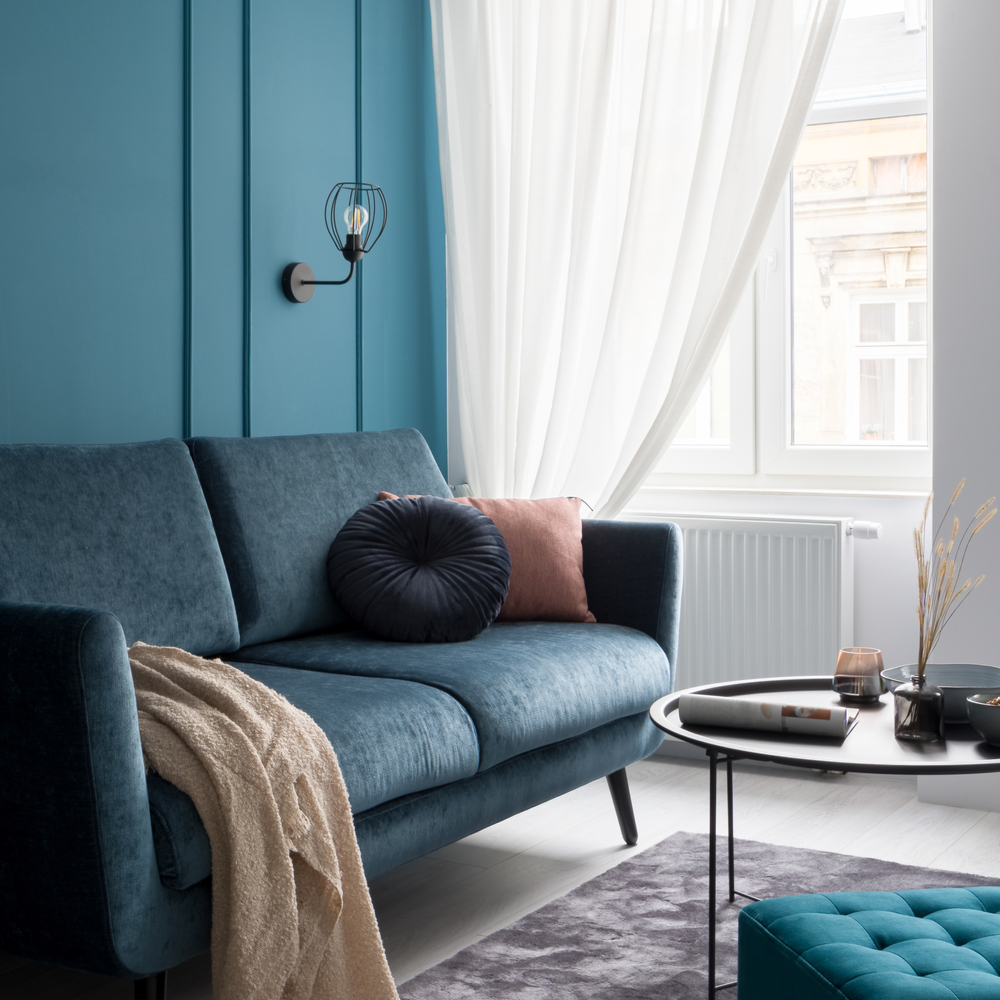
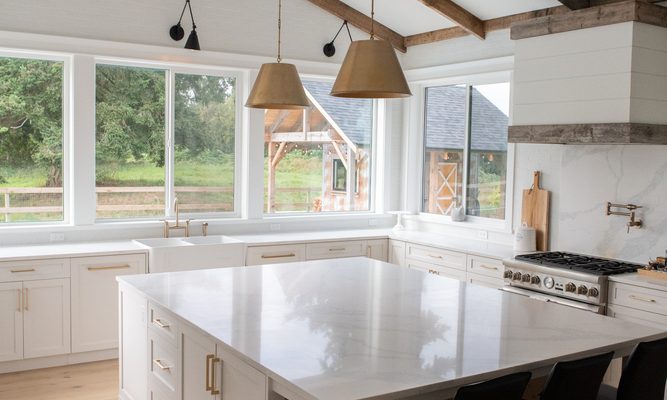
  • Maximize Natural Light –  Arrange your furniture and decor to maximize natural light exposure. If you have limited window space, light-colored walls and furniture or wall art with reflective surfaces can help to bounce that coveted natural light around your rooms.

————-

The connection between lighting and mood is an interesting mix of science and psychology. Whether it’s nurturing warm hues or energizing cool tones, the quality and type of light in our surroundings truly affects our mood and emotions. With the right information in hand, you can thoughtfully create spaces that elevate, rejuvenate, relax, and inspire. So, next time you turn on a light, remember that you’re not just lighting up a room – you’re boosting your mood too!

———–

Need more bright ideas for the lighting in your home? Contact us today to chat with an expert! 

Filed Under: 2024

Time Traveling Through Bathrooms

Time Traveling Through Bathrooms

by admin · Nov 13, 2024

Have you ever watched a television show or movie set in a time period that made you want to hop in a time machine? Opulent architecture and fabrics from the Edwardian age, bohemian vibes in the 70s, smoky dens and midcentury furniture in the 50s… they all have style aspects that are still popular in homes today. 

While you may not want to redesign your home completely in a particular period’s style, a bathroom is a small space where it’s easy to incorporate your favorite era’s designs. Let’s take a jump into the past, present, and future with some fun bathrooms that might serve as real inspiration for your own renovations!


AI Generated

The Gilded Age 

When more was more, the 1870s was a period full of ornate designs and a whole lot of gold. While you may choose not to go as maximalist as some of the fashionable folks of this period, oversized mirrors, sumptuous linens, and gold and glass fixtures make for a truly luxe lavatory. 

Always wanted a dramatic chandelier in your home, but felt it was too “much” in your regular living spaces? Put it in the bathroom! Feel free to experiment with gold handles, doorknobs, and towel bars – they’ll make a big impact, and they’re really easy to swap out if you change your mind down the road.


The Edwardian Era

If you’d love to trade places with the Countess of Grantham, a bathroom with touches of the Edwardian Era may be perfect for you. Rich woods, freestanding tubs, and beautifully arched architectural details were the norm of the time. 

While you probably don’t have a crew of “downstairs” staff to tend to your every need, you can still feel like an aristocrat when you install vintage-inspired fixtures that provide a warm glow.


Mid-Century

If you watched Mad Men more in awe of the décor than Don Draper, then a bathroom in a mid-century modern style is right up your alley. Tapered legs and natural wood tone vanities combine with colors like olive green, rust, soft pink, or blue. 

While you might not enjoy a 10am scotch accompaniment to your Zoom meetings, you can bring a little 50s flair into your life through bathroom decor. Choose furniture with clean lines, abstract art and fixtures, and organic shapes (like a round or oblong mirror) to really instill the room with a mid-century feel. 


The Hippie-Vibe 70s

Peace, love, and macramé! The 70s were a time of exploration, advocacy, and a laid-back design style that is experiencing a resurgence today. Beaded or woven light fixtures, fiber wall hangings, and plenty of plants help set a casual, bohemian vibe in your home. Grab some incense, pull the beaded curtain closed, and turn on some Grateful Dead for a very chill soaking session.


The 80s

The 80s were all about the party, which meant not shying away from bold colors, textures, and fixtures. Olive green bathtub? Sure! Stairs leading to an oversized Jacuzzi tub? Why not? Patterned carpet in the bathroom? Uh, ok, let’s never revisit that. 

Designers are bringing some of the 80s attitude into bathrooms again, embracing colorful toilets and tubs and saying “more is more!” Maybe you wouldn’t use teal tile in your kitchen, but a little playfulness in bathroom design never hurt anyone. In fact, one might say it’s totally rad.

Want to add a touch of (the good part of) the 80s? Consider a pink or green toilet, terrazzo tile, or a bold light fixture to bring pizzazz to a functional space. 


Turn of the Century

While teens of the Y2K era were busy covering their rooms with colorful posters and blowing up their inflatable chairs, their parents had very different ideas for the rest of the house. The 90s ushered in an era of minimalism with warm browns, satin nickel and brassy gold, and honey oak. And in the bathrooms – who could forget all of that glass block? 

For many, this era is still a little too fresh to want to do a repeat, but we think there are some great opportunities to bring the best of the Y2K bathrooms into today. For example, including warm undertones can make modern minimalist bathrooms feel more cozy and comfortable, and today’s modern light fixtures are popular in both silver and gold finishes. 


The Present

It’s fun to turn back the clock, but we have to give credit to the current era of design. We’ve kept the focus on creating a peaceful retreat, but allowed a little more life to enter the chat. Homeowners today are sticking to their natural materials and earth-toned palettes, while also finding ways to add a little bit of personality to their bathrooms using things like houseplants, wallpaper, paint, funky mirror shapes, unique light fixtures, and even colored tile to brighten up their space. 

In a home designed in the trends of the 2020s, you’ll notice twists on previous eras of style. Mid-century-inspired mirrors mingle with wood laid in herringbone patterns (a trend from the 16th century!) and hexagon tiles. Modern appliances and light fixtures are nestled in between old-world-inspired wall molding and trim. Today’s bathrooms are designed with style, health, and sustainability in mind – saving the planet while promoting wellness. 


The Future

Tech enthusiasts and aspiring space travelers, this is the bathroom for you. You’ll be amazed by the features available for bathrooms these days, from deodorizing washlets, to heated water-proof flooring, smart mirrors and smart lights to smart toilets and smart showers, and more. 

While we don’t know what the future may hold, this rendering gives us a glimpse at the possibilities! Futuristic bathroom designs tend to lean more minimalist, focusing on functionality over style – but that doesn’t mean the room needs to feel sterile. We hope to see people incorporate natural materials (and maybe a houseplant or two) to keep their homes from feeling like a bathroom on a space station. (Unless astronaut-core is the next hot trend – only time will tell!)

———————————

Whether you’re a vintage vixen or a tech maven, the bathroom is a fantastic room to incorporate more flashy or fun features that you might not choose in the rest of your home. Considering humans spend an average of 2+ years in the bathroom in their lifetimes, it’s a room worth making your own!

No bathroom is complete unless it is well-lit. When it comes to lighting your bathroom or powder room (or any other space for that matter), checking in with a lighting specialist who can give expert tips and style suggestions will help you to get your shopping right the first time. Stop in today to browse our selection and speak to an expert who will help make your dream bathroom a reality.


Filed Under: 2024

What is CFM? Ceiling Fan Acronyms Demystified

What is CFM? Ceiling Fan Acronyms Demystified

by admin · Nov 6, 2024

If you’ve ever shopped for ceiling fans, more than likely you’ve run across a new few terms and acronyms. Don’t fall into the trap of ignoring the specs and shopping for looks alone – CFM is an important term to understand before you decide on your next ceiling fan.

What is CFM?

CFM stands for Cubic Feet per Minute, which is a measurement that tells you how many cubic feed or air pass by a point in one minute. For ceiling fans, the CFM will tell you how much air a fan can move, or how “windy” it will feel at its highest speed. You’ll also see CFM referred to as “Max Airflow”.

There are a few things that can impact a fan’s CFM, including the motor and the number, pitch (or angle), and length of the fan’s blades. The most important thing to remember is that the higher the CFM, the more air the fan will move.

How much CFM do I need?

Generally speaking, a ceiling fan with a CFM over 4,000 should be enough for your needs, but a CFM over 6,000 is better. Some brands call fans with a CFM over 7,000 high airflow and over 9,000 CFM extreme airflow. 

This gets more complicated when you take into account the size of the room and the height of the ceiling. A small bedroom with 8 foot ceilings will be fine with a fan with lower CFM, and a large great room with vaulted ceilings will need to have a fan with much higher CFM in order to move enough air to feel it throughout the space. 

Because fan and motor designs vary by the fan and the brand, the best way to know for sure if you’re getting a ceiling fan that will work well for your room is to check the manufacturer’s recommendations for room size. 

CFM and Energy Efficiency

CFM is a useful measurement on its own, but it’s also a the key ingredient for figuring out how efficient your ceiling fan is. If you don’t pay attention to efficiency, you could accidentally end up with a fan that uses a lot of energy, costing you more money to use than you realised until it’s too late. An energy efficient fan will move more air using less energy, meaning you can keep your room cool without an unexpected spike in your power bill. 

To determine the efficiency of a fan you have to do a little bit of math. Airflow efficiency is CFM divided by the watts (or energy) used to power the fan at its highest speed. For example, a ceiling fan with 4,000 CFM that uses 80 watts will have an airflow efficiency score of 50 (4,000 / 80 = 50). 

Generally speaking, a ceiling fan with an airflow efficiency of 75 is considered efficient, but this can vary depending on the size of the fan. One of the easiest ways for consumers to tell if a fan will be energy efficient is to look for the Energy Star logo on the packaging. Any ceiling fan with an Energy Star endorsement will be much more efficient than conventional fans, which will save you money in the long run.

To see a breakdown of how Energy Star uses fan size and CFM to determine whether or not a fan is eligible for an Energy Star rating, check out these graphs. If energy efficiency is a goal for your ceiling fan search, you can also browse ceiling fans on our website, and filter by Energy Star to see only fans with an Energy Star certification. 


In short, CFM is a measurement that tells you how much air a fan moves at its highest speed. How much CFM you need from a fan depends a lot on the room its in – the overall size, the usage, the ceiling height, etc. While CFM isn’t the only statistic on the box that matters when shopping for a fan, it’s definitely an important number to consider – especially how it relates to energy efficiency and the amount of money you’ll spend using your fan over the years. Need help finding a ceiling fan? Our lighting experts can help you find exactly what you need at Western Chandelier.


Filed Under: 2024

These 30 Mistakes Make Your Home Look Dated – And How to Fix Them

These 30 Mistakes Make Your Home Look Dated – And How to Fix Them

by admin · Oct 30, 2024

We all make mistakes – sometimes without even knowing it. If your home’s feeling dated and you don’t know why, these fixes will help you to bring your home out of the past.

Mistake #1: All grey interiors

Once the height of interior fashion, all grey interiors have fallen in popularity. Now, they’re more often seen as devoid of personality and boring. 

The Fix: Go bold

Bold colors are in! Tired of boring exteriors, homeowners are adding life and color to their homes. If a solid, bold color feels intimidating, try painting a single feature wall or hanging a large, graphic art piece instead!


Mistake #2: All tan exteriors

If you’re missing contrast, you’re missing out. For a long time, realtors and home builders encouraged clients to choose “safe” colors, but what we’ve ended up with is rows of dirt-colored homes that look like they’re lost in time.

The Fix: A bit of paint goes a long way

The easiest way to spruce up the exterior color of your home is to paint it – but that’s a pretty big undertaking. If a full paint job isn’t your idea of a good time, try painting your door to add a pop of color.


Mistake #3: Glass blocks in the bathroom

Wildly popular in the ‘90s, glass blocks were originally used to let light in without sacrificing privacy. But, they ended up being a trend that didn’t last. 

The Fix: Privacy glass

Many modern bathrooms use simple clear glass in the shower, but if you’d rather shower in private, go for patterned, frosted, or etched glass. This glass comes in a variety of “levels” – so you can find one that will meet your privacy requirements without having to resort to bulky glass blocks.


Mistake #4: Marble or tile countertops

In the 80s and 90s, marble countertops were often the go-to luxury choice, but it’s impractical in the kitchen because it scratches and stains easily. Today, marble countertops tend to feel over-the-top and dated. Tile countertops were also a popular budget option, but similarly, they are a nightmare in the kitchen – the grout is porous and impossible to keep sanitary and clean, and the individual tiles can crack if exposed to heat. Both of these countertop materials will make your home feel dated.

The Fix: Modern materials

The best option is to replace them with a more modern material like quartz or granite. If that’s not in the budget, or if you’re renting, you can also try covering dated countertops with a laminate sheet.


Mistake #5: Mirrored closet doors

This 1980s staple was a must for making spaces feel larger, but in today’s design world it often feels more tacky than tasteful. 

The Fix: Freestanding mirror

If you still need a place to check your ‘fit before you leave your room, instead opt for a freestanding or leaner mirror. 


Mistake #6: Crammed closets

Staying by the closet for a minute, another thing that can make your home feel dated is a crammed closet. It’s a disorganized mess that leaves you wondering how long ago the collecting started.

The Fix: Donate and Organize

In a world where we’ve forgotten how to reuse rather than replace, our closets are easily cluttered by the redundant and obsolete. It’s an issue so far spread that there are hundreds of books written about it, and we have entire stores dedicated to helping us organize our homes. 

First, go through and donate anything you haven’t worn in a year. Second, invest in smart space-saving closet organizers that fit your needs. If you’re feeling fancy, try adding some LED string or puck lights inside shelves or over collections. It might take a weekend (or two, or three), but that’s what it takes to bring your stuck-in-the-past closet back into today’s world.


Mistake #7: Outdated appliances

Listen, appliances can be pricey, and sometimes it’s better to stick with the devil you know. We get it. But it doesn’t change the fact that your dated microwave oven combo is tethering your home to the past.

The Fix: In with the new

Replacing a large, dated appliance with a modern version makes a huge impact on the entire space. (We’ve also seen some pretty cool things done with a bit of paint or contact paper for the DIY-inclined.) 


Mistake #8: Builder-grade light fixtures

When you buy a home, there are often little surprises that come up. “It came with the house” is cute when it’s unexpected lilies and crocuses in the spring… not so much when it’s the flush-mount dome lights, less affectionately nicknamed “boob lights”. 

The Fix: Swap it out

Swapping out one light fixture for another is usually an easy, beginner-level DIY. Stop in at a local lighting showroom (you’ll find better quality lights for the same price as a hardware store), choose one you love, and bing bam boom you’re back in the modern age.


Mistake #9: Relying solely on a single ceiling light

Ceiling lights are great – they give off ambient light for an entire room. But… if that’s your only light source then your room is likely to have dim and dingy corners that pull the design down.

The Fix: Add a lamp

Light Layering is a big deal in the design world. Whether it’s a floor lamp, table lamp, or even a wall-mounted sconce, adding another layer or two of light will do magical things for your space. 


Mistake #10: Exposed and cluttered cords

Nothing screams “my home was designed before the modern age” like draped or messy bundles of cords. 

The Fix: Cable management

There are so many options to help manage your messy cords. From peel-and-stick cord hooks to spiral cable wrap, to hook and loop tape on the back of a power strip, to flat plugs that fit behind furniture, there’s a solution for every problem if you just take a minute to look for it. 


Mistake #11: Cluttered bedside 

We’re too far into this modern age to be dealing with a messy bedside table and nowhere to charge a phone.

The Fix: Multi-purpose lamp

Gone are the days of diving under the bed, knocking things off your nightstand, looking for a phone cord. Lamps with USB charging ports come in a huge range of styles, and make it easy for you to plug in your phone at the end of the day. They’re also a great option for guest rooms – no one likes to beg a forgotten charger block off their host.


Mistake #12: Wood paneling

All the rage in the 70s, wood paneling has plagued home buyers for decades ever since. 

The Fix: A modern take

If you love the look and feel of natural wood in a space, you can still have it! There are plenty of modern takes on this design, including acoustic wood paneling that does double duty – giving you a natural design element and dampening the sound in the room.


Mistake #13: Old (or nonexistent) patio lights

If your outdoor space is poorly lit, or lit by old fixtures, it’s a great way to make it feel older and less cared for than it actually is. Lighting matters!

The Fix: String lights

It’s such a simple fix there’s no surprise at all at how popular string lights have become. Add a few connected strands to your outdoor space to make it feel cozy and comfortable. 


Mistake #14: Poor exterior lights

For so many, the exterior lights on their home are an afterthought. Over time, exterior lights can be sun-faded or scratched from years in the elements, and they can make your home feel unkempt. Similarly, too-dim light fixtures can make your home feel dark, dingy, and dilapidated.

The Fix: Better fixtures

Whether your exterior lights are dingy or dim (or both), replacing them is one of THE easiest ways to give your home an instant facelift. While you can hire an electrician to do this for you, this is an easy project for most homeowners when the fixtures are easily accessible.


Mistake #15: Weeds

It doesn’t matter how well you care for your home on the inside, if the first impression says “I haven’t been cared for in a while” then it’ll make your whole home feed dated. 

The Fix: A little elbow grease

Whether you do it yourself or hire it out, keeping your front yard looking well-kept will make your entire home feel up-to-date. 


Mistake #16: Obvious fake plants

We get it – taking care of plants isn’t everyone’s cup of tea. And we’re not here to throw shade at anyone that uses artificial plants to bring life to the inside (or outside) of their home. But – if you’re using fake plants that LOOK fake, then you’re more likely to remind guests of their Great Aunt Marjorie than be complemented on your decor.

The Fix: Invest in quality artificial plants

There are incredible options available for artificial plants that look lifelike. It’s worth it to focus on quality over quantity and invest in artificial plants that will look great for years to come.


Mistake #17: Old throw pillows

We love a good throw pillow. It brightens a space and gives a comfy touch or personality. What we don’t love is a dated or dingy throw pillow. 

The Fix: Replace or recover

The throw pillow world is your oyster – with a new pillow cover you can say goodbye to your dated pillows and hello to your new space. If your pillows are dingy and don’t come clean in the wash, we’re sorry but it’s time to say goodbye and start fresh. 


Mistake #18: Cluttered home office

We’re not judging you if you close and lock the door to your office when guests come over. We’ve all been there. But a cluttered office can make your home feel less than – and for many people working in a cluttered space can make it harder to concentrate.

The Fix: Add functional storage

We’re not here to tell the work-at-home artists to put their stuff away, but we do believe in the power of great storage to make a space easier to use. When the things you aren’t using are out of the way, you have more room to work and fewer distractions. And… maybe it’ll be okay for your friend to peek their head in and say hello.


Mistake #19: Ugly organizers

Sometimes when we start organizing, it’s tempting to buy the cheap fixes that look, well, awful. They’re a great way to get started, but if your regular-use organizers are all function, no design (dated coat rack, cheap plastic over-the-door shoe organizer or spice rack, dented fabric bins, etc.) then they might be bringing down your home’s design. 

The Fix: Organize with design in mind

There is no shortage of organizers on the market, and no matter which place in your home needs one, you’re sure to be able to find something that both works and looks good. Take your time and swap them out one by one, or buy a whole system that matches. Any way you do it – you’re sure to make your home feel fresh again.


Mistake #20: Popcorn ceilings

It’s no secret that popcorn ceilings are almost universally disliked. Aside from the less-than-aesthetically pleasing appearance, popcorn ceilings from before the 1980s (and some into the ‘80s) often contain asbestos, making them a health hazard if they are damaged or disturbed. 

The Fix: Remove or cover

The best way to fix popcorn ceilings is to have them professionally removed, and then refinish your ceilings. For a more economical option, some homeowners opt to cover them with faux ceiling tiles instead.  


Mistake #21: Old wallpaper designs

Whether it’s a tiny pattern or a dated border, old wallpaper can make you entire home feel dated – no matter how well you’ve decorated around it. 

The Fix: Modern wallpaper

For a while, wallpaper was almost a dirty word in the design world. But we’ve recovered from our overreaction and are back to loving wallpaper – in modern prints of course. 


Mistake #22: Weak sink and shower fixtures

It doesn’t matter how well cared for they are, if your sink and shower fixtures leave you dreaming of waterfalls and firehoses… then they aren’t doing you or your home any favors.

The Fix: Swap it out

A quality faucet or showerhead can make your entire bathroom (or kitchen) feel new again. Swapping them out is a relatively basic home improvement project that most people can tackle on their own – and it’s often renter-friendly, just put the original fixture back on before you move out.


Mistake #23: Chaos pantry

Your pantry doesn’t have to be social media ready at all times (especially if you have kids), but if your pantry is perpetually overstuffed and disorganized, it can make your kitchen feel dingy and dated (not to mention it makes it harder to find a midnight snack).

The Fix: Add a few organizers 

We’re not suggesting that you go out and buy a bulk set of glass containers and a label maker (although more power to you if you do), but there are plenty of simple and affordable ways to create more usable space in a pantry, like adding a small freestanding shelf or an undershelf basket. 


Mistake #24: Old or dingy cabinet handles

We see and use our cabinet handles all the time, so it’s easy to forget how much they impact the way a room feels. If you’re less-than-thrilled every time you need to open a cabinet door or drawer, your kitchen or bathroom hardware may be making your home feel older than it really is.

The Fix: Replace them with handles you love

Replacing the handles on your cabinets is so simple. New knobs and pulls come in a huge variety of styles and colors, so feel free to go a little wild if you want – they’re easy to swap out again later if you change your mind.


Mistake #25: Tired Doorknobs

Doorknobs aren’t hard to replace, but most homeowners choose not to. This often means that your home’s doorknobs end up staying in the past… and taking your home with them. You might not even realize it’s happened – just like the cabinet knobs above, we often forget to really see them after a while.

The Fix: New knobs

New doorknobs may seem like a subtle change – but they’ll make a big impact on the way your home feels. 


Mistake #26: Not repairing wall damage

A few small dings here and there aren’t a huge deal, but if you leave large dents and holes in your walls or trim unattended they will start to make your home feel run-down. 

The Fix: Wall repair kit

Depending on the size of your hole, you might be able to get away with just some spackle and a putty knife, but larger holes need a bit more support. Wall repair kits are cheap, and there are hundreds of helpful YouTube videos that can you walk you through the repair. It’s usually a quick fix – minus drying time.


Mistake #27: Torch lamps

Once widely popular, torch lamps are known to many now simply as bug graveyards. While there’s nothing inherently bad about them – they often just feel dated, and they really are hard to keep clean between the dust and the dead bugs that build up in the shade.

The Fix: Modern lamp

There really are thousands of styles to choose from – and just about any style that doesn’t collect bugs in its free time should be an improvement. A quality, modern lamp completely transforms a space in two ways – in the style of the lamp itself, and in the light it shines on your space.  


Mistake #28: Heavy drapes and old blinds

Unless you’re heart is set in the 70s and you love a hefty thick fringe, heavy drapes can weigh down a room, making it feel dated. Likewise, old blinds can make a room feel dingy… and nobody wants that. 

The Fix: Modern window treatments

Curtains aren’t off the table – and neither is fringe! If you love a good statement curtain moment, there are plenty of modern alternatives that will breathe fresh life into your space. Modern blinds come in a wide variety of styles, and are much easier to replace than most people think. Many blinds come in standard widths, and most stores will cut them to size for you when you purchase them to get the right fit. 


Mistake #29: Analog thermostat

If your thermostat looks like it was installed before Apple went big, it’s time for an upgrade. 

The Fix: Smart thermostat

A smart thermostat will do a much better job of accurately maintaining your home’s temperature, which will help you save money on your utility bills. It will also look much nicer on your wall – which is a huge plus.


Mistake #30: Low-quality lights

In the age of online shopping, it’s so easy to search for a fixture, sort by price, and buy the cheapest thing you see without considering the quality. What you get may look good for a moment, but low-quality fixtures always chip or break, and they’ll make your home look outdated until they’re replaced.

The Fix: Ask an expert

When it comes to home lighting, you’re way better off checking in at a local showroom than heading to a big-box chain store. Showroom owners are choosy about which brands they carry, and have years of specialized experience in lighting that they can use to help you find what you need. 


Some people place lighting showrooms in the same category as boutique shopping, expensive and questionable – but that couldn’t be further from the truth. When you shop at a showroom you’ll find similar styles and prices you’d find elsewhere – without the buyers’ remorse. If you’re looking to update your home, stop by our showroom and ask one of our experts. We’ll help you narrow down your options and give you insider tips – and most importantly, send you home with exactly what you’re looking for.


Filed Under: 2024

From Dark to Dazzling: 6 Tips to Achieve the Best Basement on the Block

From Dark to Dazzling: 6 Tips to Achieve the Best Basement on the Block

by admin · Oct 23, 2024

If your basement is more of a second thought or storage dungeon than a cozy retreat, you’re not alone. Many homeowners face the challenge of turning this below-ground space into something welcoming, beautiful, and functional. In this post, we’ll shed light on the challenges you might face and offer some creative solutions to transform your basement into a spectacular space.

Ready to rise above design challenges and claim your basement’s place as the “Best on the Block”? Let’s get started!

1. Dealing with Limited Natural Light

THE CHALLENGE

By their nature, basements often suffer from a lack of natural light, creating a dim and sometimes gloomy atmosphere. 

IDEAS AND SOLUTIONS

  • Lighting Placement: Brighten up the dark corners of your basement by strategically placing overhead lighting and light fixtures. 
  • Light-Colored Walls: Opt for light-colored wall colors to reflect light and create a feeling of brightness.
  • Mirrors: Hang mirrors to bounce the light that is coming into the space around the room, making it feel more open and airy. 
  • Egress Windows: Consider installing egress windows (windows designed to provide an emergency exit) if feasible, not only for safety but also to allow natural light into the space.
  • Window Wells: Create light wells or window wells to redirect natural light from above ground into the basement. These aren’t an easy addition if you’re doing a remodel rather than a new build, however, they are often the best way to add more natural light to your basement.

2. Overcoming Low Basement Ceilings

THE CHALLENGE

Low ceilings can make basements feel cramped and claustrophobic – the last thing you want when trying to cozy up to watch a movie or when hosting a family event! Changes to the structure or foundation can solve this issue, however, they are time-consuming projects and costly.

IDEAS AND SOLUTIONS

  • Strategic Lighting: Use low-profile or recessed lighting to avoid having light fixtures hang too low into the space. A low-hanging fixture is a visual reminder of how low the ceiling is, and can also be a hazard for taller friends and family.
  • Vertical Lines: Incorporate vertical lines in the room using things like bookshelves, curtains, structural elements (windows, pillars, etc), floor lamps and pendants, or wall art.  These vertical lines subtly help to make the space feel taller rather than wider.
  • Optical Illusions: Choose low-profile furniture to create the illusion of more headspace. You can also use vertical stripes or patterns on walls, art, or furniture to create the illusion of height. Additionally, painting the ceiling a light color, usually bright white, can help make a low ceiling appear taller.

3. Tackling Moisture and Humidity Issues

THE CHALLENGE

Basements can be prone to moisture, leading to mold growth, unpleasant odors, and a cold “damp” feeling.

IDEAS AND SOLUTIONS

  • Proper Ventilation: Install a dehumidifier or invest in proper ventilation to keep humidity levels in check.
  • Waterproofing: Seal any cracks or leaks in the foundation to prevent water from seeping into the space. 
  • Use Moisture-Resistant Materials: Choose durable, moisture-resistant materials for your flooring and walls. Not only will this limit potential issues but it will make using and cleaning the space easier for active kids and entertaining!

4. Balancing Lighting for Different Functions

THE CHALLENGE

Finding the right balance of lighting for various activities – from watching movies and playing games to exercising and working – can be challenging in a multi-functional basement.

IDEAS AND SOLUTIONS

  • Dimmer Switches: Install dimmer switches to adjust lighting brightness according to the activity and time of day.
  • Lighting Zones: Divide your basement into functional zones and install separate lighting types for each area to tailor to your specific needs. For instance, a kids’ play area should be brightly lit while a home theater area should have lighting that can be dimmed for ambiance.
  • Smart Lighting Systems: Invest in smart lighting systems that allow you to control the intensity and color temperature of lights with ease.
  • Motion-Activated Lights: Install motion-activated lights in less frequently used areas of your basement, such as storage and utility closets, to save energy.
  • Smart Bulbs and Systems: Explore smart bulbs and lighting systems that can be controlled via smartphone apps, allowing you to adjust settings remotely.
  • Color-Changing Lights: Add a playful touch with color-changing lights that can set the mood for different occasions.

5. Choosing the Right Colors

THE CHALLENGE

Poor wall and furniture color choices can make a dark basement problem even worse, leading to a cave-like atmosphere. Unlike bigger, more expensive basement projects (such as structural changes), paint is usually a quick and easy fix that makes a huge difference! 

IDEAS AND SOLUTIONS

  • Light-Colored Walls: Opt for light and neutral colors for walls to reflect light and create a more open feel.
  • Bright Accents: Introduce pops of bright colors through accessories, furniture, or artwork to add vibrancy and contrast.
  • Lighting and Decor Color: Your lighting will affect how the colors of everything else in your basement appear. Warm light will make your paint and furniture colors learn more orange and red, while cool bulbs will make them appear more blue. Look for bulbs with a high CRI (Color Rendering Index) value to keep your colors true. 

Pro Tip: To see which type of light makes your room look its best without breaking the bank on a full basement’s worth of new light bulbs, try buying one or two smart bulbs and screw them into a lamp that you can move around. Turn off the other lights, and play around with the color settings to see how they affect the colors in your basement. You may find that your walls and furniture look completely different at each end of the spectrum – a free home makeover with just a flip of a switch!  

6. Creating Functional Layouts in Limited Spaces

THE CHALLENGE

Limited space in basements can make it hard to plan out a functional space. But, with some pre-planning and creativity, you can create a basement that not only meets your needs but is the space your family gravitates towards day after day. 

IDEAS AND SOLUTIONS

  • Multi-Functional Furniture: Choose furniture that serves more than one function, like a sofa bed or storage ottomans. 
  • Wall-Mounted Storage: Maximize floor space with wall-mounted shelves and storage units.
  • Multi-purpose Lighting: Choose fixtures and bulbs that can meet more than one need. Track lighting, for example, can serve as both indirect general lighting and for highlighting artwork or decor. Countertop lighting over a kitchenette can be useful for food prep, stair lights are a helpful safety feature, and a TV back light helps reduce eye strain – and all three can also be flipped on to provide low-light ambiance for movie nights. 
  • Smart Bulbs: For ultimate versatility, choose smart LED bulbs with color adjustment options. Maybe you generally prefer cooler white light but want the option to warm things up when hosting a party or relaxing with a good book. Smart bulbs can be manually adjusted or pre-programmed to change to follow your routines. They can give you a space that’s bright during the day while you’re working, and then dim at night when you’re winding down. Since basements often serve many uses, your lighting should as well!
  • Open Concept Design: Consider an open-concept layout to make the space feel larger and more versatile, especially if your basement includes a bar or kitchen area. 

Designing and finishing a basement can pose some unique challenges, but with creativity and strategic planning, your basement has met its match! Embrace the unique characteristics of your basement space, experiment with different designs and lighting solutions, and choose materials and decor that stand up to the demands of below-ground living. Your basement has the potential to become a vibrant, functional, and inviting extension of your home—and the envy of the neighborhood!

————

Are you ready to create the basement of your dreams? Let the design experts at Western Chandelier guide you. Contact us today and we’ll help you get started! 

Filed Under: 2024

7 Stunning Kitchens that Will Inspire You to Install Pendants Immediately

7 Stunning Kitchens that Will Inspire You to Install Pendants Immediately

by admin · Oct 16, 2024

Pendants lights – not only do they make a great focal point, they also provide the perfect amount of light when the late-night ice cream cravings hit. From moody modern to rustic charm, pendant lights effortlessly fit into just about any interior style, making them a favorite choice for homeowners and designers alike. With a little inspiration, your kitchen can find its perfect pendant match to infuse your kitchen with both charm and functionality!

Clean Lines

This kitchen should be on the cover of a magazine! We love how these tapered black pendants draw your eye upward and make the ceilings feel even taller! They’re perfect for a kitchen with a modern vibe, but they are so versatile that they’ll pair well with any style.

Rustic Charm

These cage pendants bring a little modern charm to a kitchen with a rustic flair. The black contrasts with the white and wood kitchen accents, and ties together the cabinet hardware, chair legs, and window casings. They give the whole kitchen a cozy atmosphere that lends itself to even the most important conversations! Obsessed is an understatement.

Matching Marble

Contrast is important in interior design – but it’s not the end-all be-all for lighting choices. Instead of matching your fixture finishes with t he cabinet hardware or appliances to make them pop, consider looking into pendants that match your countertops or cabinet color! Choosing pieces you love lets your personality shine through the design and it obviously pays off.

Industrial Modern

This kitchen has stunning industrial elements we can get behind – exposed brick, iron window casings, and sleek cabinet fronts to name a few! The warm tones turn a colder industrial style into a comfortable space where you’ll want to spend your time. But the pièce de résistance of the entire space is this gorgeous asymmetric pendant cluster hung over the island. This modern fixture ties everything together for a cohesive look that we couldn’t love more!

Monochromatic Breakfast Bar

Monochromatic can be a tricky look to pull off, but when it works, it works. Using all green for the cabinets and walls makes the wood and yellow accents pop! The green dome-shaped pendants hung above this bar blend in with the walls to highlight the most-used area in any kitchen – the countertop! The accessories on this counter give the otherwise monotone space plenty of personality with practical pieces in fun pops of color. You could easily whip up some toast and hot chocolate without even opening a drawer! 

Dainty Glass

Glass shades are always going add a touch of elegance to a space, but these ones really pull out all the stops. They’re the perfect size to give you enough light to chat with your loved ones while you’re baking your famous cookie recipe or setting out a snack bar for the big game. The gold accents on these pendants pair beautifully with the faucet, and the result is a kitchen we are dying to steal. 

Timeless Beauty

Updating your kitchen can be a massive undertaking – you shouldn’t have to do it every 5 years. Instead, pick classic pieces like these matte black pendants that will match your style for years to come. A pendant with a classic shape in a neutral finish will adapt to whatever fashion throws your way – and it’ll look gorgeous doing it.

—

No matter the style, pendants are a staple in kitchens for a reason! Pendants provide much-needed extra light in important countertop work spaces… and they totally transform the mood and atmosphere of your kitchen! No matter what direction you choose, your new kitchen pendants are sure to make a statement. 

For your next kitchen lighting project, don’t get caught catching buyers remorse – check in with a local lighting expert that can help you find exactly what you need. When you’re ready to get started,  give us a call and our experts will help you narrow down your options and give you tips on your next stunning kitchen lighting project.

Filed Under: 2024, Kitchen Lighting

Scale and Proportion 101: How to Avoid 4 of the Most Common Mistakes and What to Do Instead

Scale and Proportion 101: How to Avoid 4 of the Most Common Mistakes and What to Do Instead

by admin · Oct 9, 2024

Have you ever stepped into a room and immediately sensed something felt weird… but couldn’t quite put your finger on it? Without proper scale and proportion, a room’s design can crumble quickly, and leave it feeling… off. If you want to get it right, you need to learn how to balance the objects in your room with each other and the room itself.

Scale vs. Proportion

Scale refers to the size of objects in relation to the room, or how well they seem to fit together in the space. Proportion is the relationship between items, or how well they seem to fit with each other. In order to get it right you need both – the things in your home need to look right with each other and with the room itself. 

Having a home that looks balanced is easier said than done, so we have some expert tips to help you avoid some of the most common mistakes and create a home where everything works together in harmony.

Mistake #1: Choosing the Wrong Size Rug

One of the most common mistakes is choosing the wrong rug size. Rugs can be a significant investment, and novice designers might be tempted to cut costs by going with a smaller size – but don’t fall into this trap! A too-small rug can make your room feel cramped. On the other hand, a too-large rug can leave edges in awkward places and feel bulky. The right size will balance with your furniture and your room. 

Rug placement and size needs will be different in every room, so following a rug guide like this can steer you in the right direction. For example, in the living room a good rule of thumb is to select a rug that’s large enough to either accommodate all the furniture completely on top of it or have only the front two legs of each furniture piece placed on it. 

Why This Doesn’t Work: The rug and furniture chosen are noticeably undersized for the space! Relying on a floating rug island with a single chair and side table to carry the design is ineffective (and a trip hazard). To achieve balance, this room needs more furniture. You’d either need to choose seating that matches the scale of this rug to create a small conversation area, or use a larger rug to anchor larger furniture to fill the room.

What to Do Instead: We cannot emphasize this point enough: selecting the right size rug is everything! This gorgeously balanced room proves it’s worth it. This large living room has plenty of furniture, and a large rug like this provides an essential foundation that anchors the space and ties the room together. In any room, a well-fitted rug will ground the space, making it feel cohesive. 

Mistake #2: Not Enough Light

Another common mistake is to use lighting that’s mismatched with scale of the room or in proportion to the furniture. Yes, scale and proportion matter in lighting too! Lighting that is too dim or overpowering can really mess up the feel and functionality of a space. 

The key is layering your light – using various sources and types of light throughout the room to give a well-balanced light throughout the space by addressing common issues like dark corners and poorly lit work areas. A well-chosen array of light fixtures will make your home look like a designer’s been through, but how do you know how exactly much light is right for your space?

To determine your lighting needs, first you’ll have to understand a few basic light measurements. Lumens are a measurement of the amount of light emitted by a light source. A foot candle is a measurement that describes how bright a light source appears to be from one foot away. You’ll need to use both of these to calculate your lighting needs!

Larger rooms need more light than smaller rooms, and task-oriented spaces within those spaces (like a kitchen counter, office desk, or reading chair) will need more light than the rest of the room. To get an idea of how much light you’ll need, start by measuring the width and length of the room, then multiply those two numbers to find the room’s square footage. Next, use the chart below to determine how many foot candles your room or space will need. 

The last step is to multiply your room’s square footage by the recommended foot candle requirement to determine the number of lumens your space requires. Most modern light bulbs have their corresponding lumens included on the packaging. Simply add up the lumens for each bulb in your room to see if you’re in the right range. 

Example: A 20’x20’ living room has 400 square feet. The recommended foot candles for living rooms is 10-20. 400 x 10 = 4,000 and 400 x 20 = 8,000. In this room, you would want to add up the lumens for your light bulbs and shoot for somewhere between 4,000 – 8,000 lumens for the entire space.  

Keep in mind that this recommendation is for typical use. You also need to take into account all of the ways you’ll use the room, and plan balanced lighting for each situation. If the living room above was also used for movie nights and has a home office in the corner, you would need a way to accommodate those activities too. You’ll need fewer lumens for movies (dimmer switches or small lamps are a great option) and extra light for work (a desk lamp, extra overhead light, or wall sconce would work well). 

Remember, these numbers are general recommendations. In addition to being balanced, your lighting also needs to be comfortable. Start with the recommendations, then tailor your lighting from there to get what works best for you.

Why This Doesn’t Work: These small lamps are undersized for the scale of the bed and the room, which is both an aesthetic and a practical issue – nobody likes squinting at their late-night read or tripping over the black shoes on the floor in the middle of the night. 

What to Do Instead: Using a variety of light sources ensures sufficient light coverage and adds depth, enhancing the room’s overall atmosphere. In this particular space, the lamp, pendant, chandelier, and accent lighting have been thoughtfully chosen to provide just the right amount of light and are in perfect proportion with the room’s other features. Whether you’ll be using the space for a late-night book or preparing to take on your day, this room promises to exceed your expectations functionally and aesthetically.

Mistake #3: Picking the Wrong Size Chandelier or Pendant

In addition to getting the amount of light right in your space, it’s also important to get a fixture that’s to scale. Since chandeliers and pendants typically serve as a room’s focal point, it’s especially important to get it right! To avoid picking the wrong size, a few tips:

  1. Measure your room’s width and length in feet, then add those two numbers together to determine the width of your chandelier or pendant in inches. For example, if your room is 10 feet x 16 feet, your chandelier or pendant should be around 26 inches wide (except in a dining room – no head bumps please!).
  2. Measure your room’s height. We recommend adding 3 inches of height to your fixture for every foot of space between your floor and ceiling. For example, if your ceilings are 10 feet tall, your chandelier or pendant should be around 30 inches tall.

Why This Doesn’t Work: We can understand why this room doesn’t have a chandelier with those gorgeous windows as a focal point. But in the evenings, this room’s focal point will disappear into the shadows and the high vaulted space above will feel empty. A chandelier would fill this void and give this room a gorgeous 24/7 focal point. It would also provide essential lighting for the evening hours and create a cozier, more intimate atmosphere than a grid of bright recessed lights.

What To Do Instead: Use the guidelines above to find the ideal fixture size for your space. In this room, the pendant is slightly oversized, but it’s okay to make judgment calls when deciding what’s going to work best in your space since you’re the one who has to live with it! In this room, the pendant serves as the focal point and creates a more intimate conversation area. By occupying the vertical space, it brings harmony and balance to the design. If you need extra help selecting the correct size fixture or installing it, don’t be afraid to ask an expert!

Mistake #4: Small Wall Hangings on a Large Wall

We love how art and other wall hangings add personality to a space, but we often notice inexperienced designers or homeowners creating a tiny island of art in a sea of empty wall space. It’s a common mistake, but is one that is easily avoidable with a few essential tips!

When it comes to hanging pictures on a large wall, you generally have two options: creating a gallery wall or opting for a larger piece of art. Whichever you decide on, the resulting arrangement or artwork should be around 60-75% of the width of the furniture it’s above and take up 60-75% of the wall height above it for a perfectly balanced look! If you’re using multiple pieces, space them out to get the right scale. Don’t be afraid to experiment with different layouts and art pieces – you may be surprised by what combinations work.

Why This Doesn’t Work: The frames above this bed are too small, throwing off the whole balance of the room. Luckily, the solution to this problem is simple!  You can either keep the existing frames and incorporate more pieces for a gallery wall or replace them with something larger. Whichever you choose to do, getting the scale right is a non-negotiable!

What To Do Instead: The art in this room is a much better size for the room and the bed! While it might be a touch more than 60-75% of the bed’s width, it’s spaced appropriately and doesn’t hang so high that you’ll need a stepladder to see it. The result is a gorgeous room with perfect proportions and scale. Hanging the right art in the right place is critical to a design that drops jaws.

Mistake #5: Not Styling with Scale in Mind

If we could give one tip to aspiring homeowners/designers it would be this: details are everything. To achieve a beautifully designed room, you need to pay attention to both scale and proportion when it comes to accessorizing. 

When curating pieces to display in your room, some basic principles apply. First, create little moments by using your decor in groups! For example, pair a small vase with some books and a frame. Most designers say that groups look better in odd numbers, so shoot for 3 or 5 rather than 2 or 4. Second, stagger the heights and sizes of the objects in a group. Playing with proportions can help you to get a design that’s both balanced and visually interesting. Last, use a variety of colors, materials, and patterns to keep things interesting and achieve the perfect balance!

Why This Doesn’t Work: While this kitchen is full of vibrant personality and patterns, the overall effect is a tad overwhelming and disorganized. The island feels slightly overrun with a bunch of small items similar in size (although the flowers at the end do add some much-needed height). The top shelf is unbalanced and half empty, while the bottom shelf is stuffed with a row of, again, similarly-sized items. In both places, creating groups with space would give the decor a bit of room to breathe, and give each design moment a chance to shine.

What To Do Instead: This room beautifully showcases the result of investing time in thoughtful styling! Items on the counter are grouped to the edges, leaving plenty of work space. Items on the shelves are spaced out to fill the shelves without blocking the light, a must for this stunning storage solution that maximizes shelf space without sacrificing the view. Even the large shelving feels unobtrusive because it’s to scale with the rest of the room. While this kitchen has a more minimalist vibe, paying attention to scale and proportion can give you a balanced look with any style from a traditional living room to a maximalist bedroom. 

—

Understanding scale and proportion is essential for making design choices that lead to a balanced and harmonious home. Whether choosing the correct size rug to ground a room, selecting a beautiful light fixture, hanging wall art with precision, or curating decorative pieces thoughtfully, every detail matters. By avoiding these four common mistakes and following our tips, you can transform your home into a space that’s the perfect blend of form and function. For more personalized advice, call Western Chandelier! Our experts would love to answer your questions and help you as you design a home you love.

Filed Under: 2024

« Previous Page
Next Page »

Copyright © 2025