• Skip to primary navigation
  • Skip to main content

Western Chandelier

  • Buying Guides
  • Styles & Trends
    • Bathroom Lights
    • Ceiling Fans
    • Ceiling Lights
    • Lamps
    • LED Lights
    • Outdoor Lights
    • Smart Lights
    • Wall Lights
  • Wellness & Safety
  • Shop Products

admin

How to Safely Install a Ceiling Fan

How to Safely Install a Ceiling Fan

by admin · Feb 28, 2024

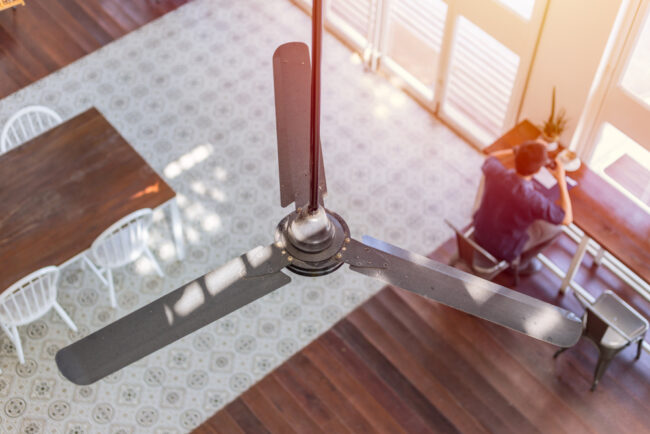
Installing a new ceiling fan is a cheap way to save on energy costs all year without compromising on comfort. In the summer, ceiling fans cool down the house by creating a breeze. In the winter, they help circulate the heated air to warm the whole room evenly. 

Putting in a ceiling fan is a win-win for your comfort levels and your budget – and it’s a pretty simple DIY project for homeowners. Plan on giving yourself a few hours (depending on the type of fan and your experience level with lighting DIYs), and grab a friend that can help you hold things in place while you work.

If you’re buying a ceiling fan new, it should come with thorough installation instructions. We always recommend following those instructions exactly to be sure that your fan is installed safely and properly. If you’re installing a secondhand fan, you may be able to find the installation guide online by searching with the model number on the fan. Either way, we’ll walk you through the basic steps here so that you can prepare. 

1. Preparation

Before you break out your tool belt, make sure you have a good plan in place. There’s nothing worse than being in the middle of a project and realizing you don’t have everything you need to complete the task.

Tool Checklist

Before you take on a ceiling fan installation project, make sure you have all the tools you need so you don’t have to rush off to your local hardware store for a last-minute purchase. To install a ceiling fan you’ll need to have a:

  • Voltage Tester
  • Ladder
  • Measuring Tape
  • Screwdriver
  • Ceiling Fan-Rated Junction Box
  • Fan Brace
  • Wire-Cutter/Stripper
  • Light Bulbs
  • Globes/Shades if they aren’t included
  • An extra-long downrod if you’re installing on a sloped ceiling
  • Ceiling Fan and Kit

Choosing the Right Fan Size

Measure the room you’re working in before you start. Not all fans are created equal, so pick one that will fit. Use the following guidelines to help. 

  • For rooms smaller than 75 square feet (like bathrooms), pick a fan with blade spans of less than 36 inches.
  • Blade spans between 36 and 42 inches are ideal for rooms up to 144 square feet. 
  • A 44-inch span is perfect for rooms up to 225 square feet, like a dining room.
  • For rooms that are 225 square feet or larger (a large living room, for example), you’ll need a fan with a 50 to 54-inch blade span.
  • The more space between the ceiling and the fan, the better! The ideal ceiling fan height is 8-9 feet above the ground. 
  • If your ceiling is less than 8 feet, you’ll most likely need to install a flush-mount fan (no downrod).
  • High pitched ceilings typically require you to buy an extra-long downrod (so that the blades won’t hit the sloped ceiling), so check your ceiling height and angle before choosing your downrod.

Pro Tip: Once your fan is installed, the tips of the blades should be at least 30 inches from the walls, and the bottom edges of the blades should be at least 7 feet above the floor. 

Other Important Tips
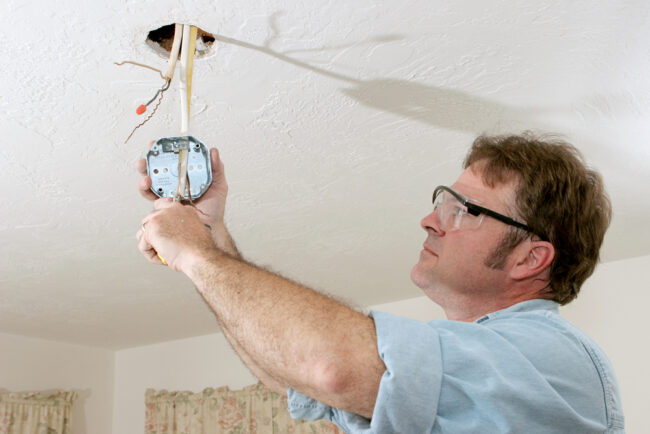
  • Ceiling fans are heavy! They need to be anchored properly to an electric ceiling box designed to hold the weight of the fan. Inspect the electrical box to ensure it’s fan-rated. There should be an inscription on the box to indicate this. If it’s not, you’ll also need to purchase a fan box before you get started.
  • Check to make sure the light switch you’re using is wired appropriately for the fan. If it isn’t, you may need to call a professional to get the job done.
  • Check the ceiling joists for any wiring or plumbing pipes that may be in the way.
  • If you’re adding a new fan where one didn’t exist, check local building codes to determine if you need a permit.
  • Always check your installation guide for any additional requirements that are specific to your fan. For some expert help choosing the perfect fan for your space, give us a visit or a call and we’d be happy to help.

2. Safety
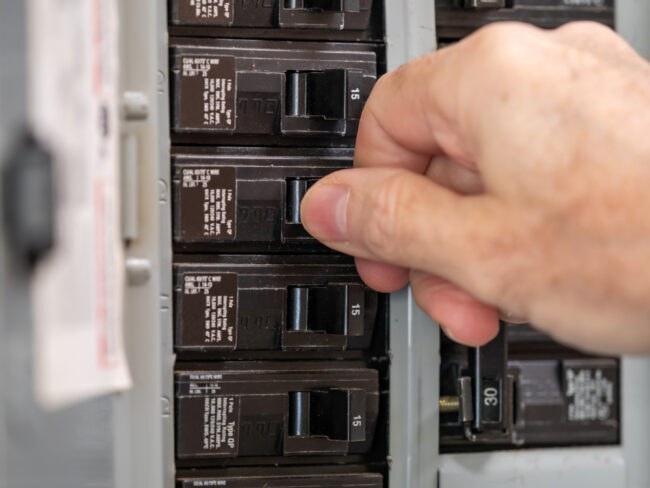
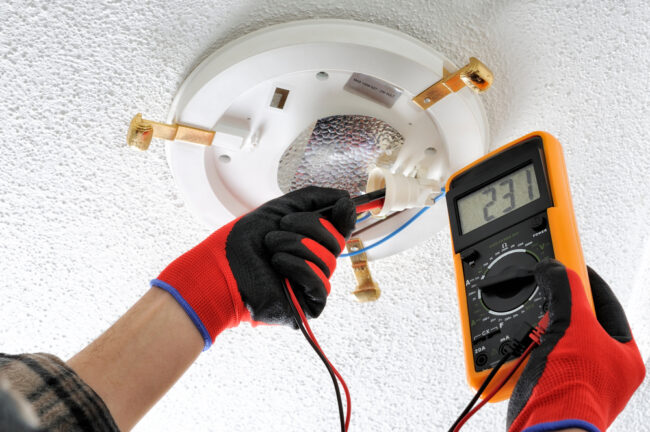
Now that you’re ready to begin, head out to your circuit breaker and turn the power off for the room where you’ll be installing your fan. Also, make sure all of the wall switches in the room are safely in the “off” position. Do not rely on a wall switch alone to protect you from electrical shock! Always use a voltage tester to be sure the power is off before handling wires.

Pro Tip: Place some electrical tape over the switches you’ve turned off on the circuit breaker. This will prevent anyone from switching it back on while you’re working.

3. Remove Your Old Fixture
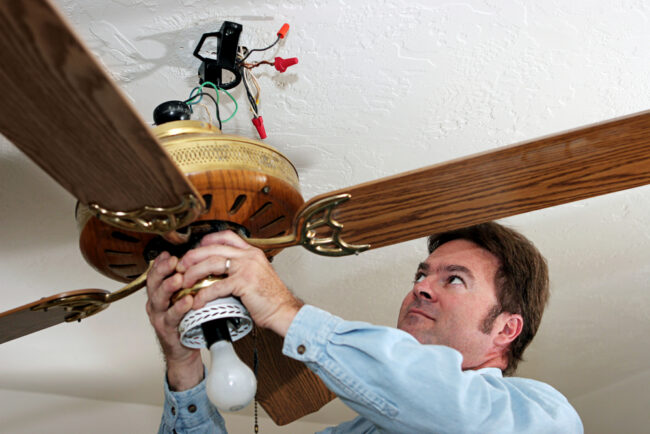
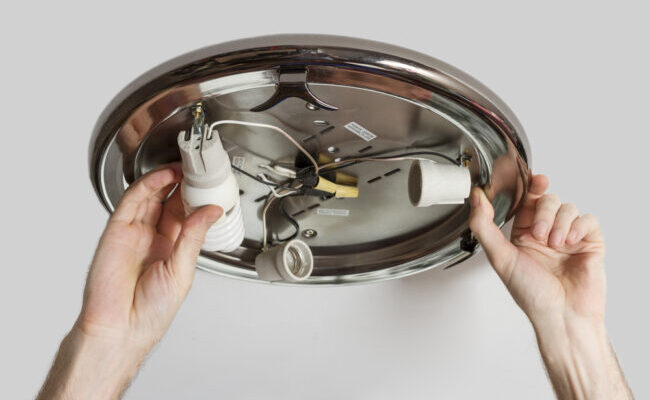
Let’s get started! First, you’ll need to take down the existing fixture. Most fixtures have easy-to-find attachment points, like screws or twist-off caps. Remove accessories like light bulbs, shades to get down to the base of your fixture, then unscrew the base from the ceiling.

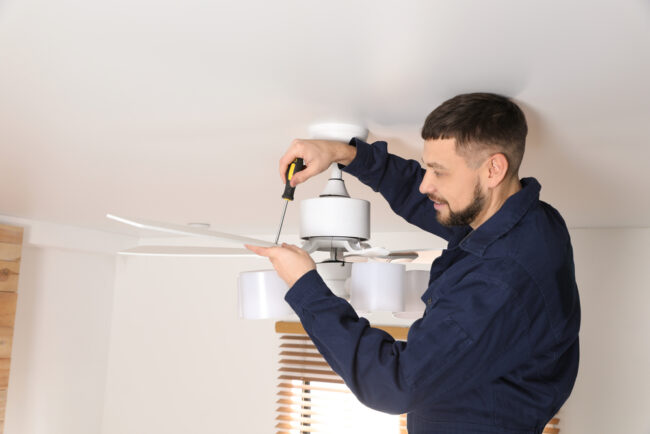
If you’re removing an existing ceiling fan, remove the light bulbs and globes first. Then, take down the light kit (if needed – some fans have them, some don’t). Unscrew and remove the fan blades next. At this point, you may need to enlist a helper as the full weight of the fan base and motor can be heavy. Pull off the canopy (metal cover at the base of the fan). The last step is to remove the mounting bracket with a screwdriver!

Once you have the base of your fixture dropped away from the ceiling, unscrew the wire nuts connecting it to the electrical box. Be sure to test the wires with your voltage tester first!

4. Install a Fan Box
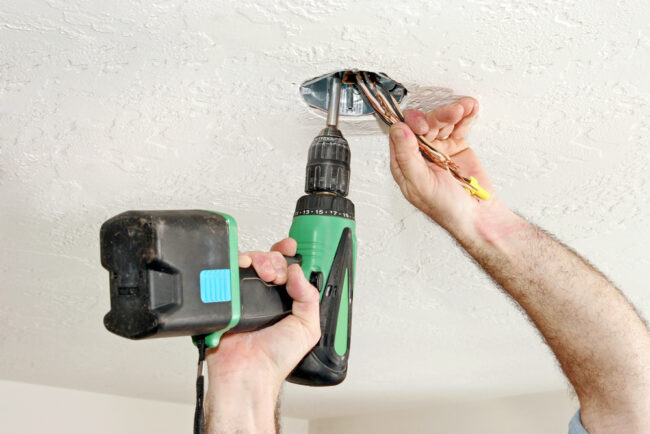
Before you start, check your existing electrical box. If it isn’t rated to support the weight of your fan, you’ll need to install a new one. To see if your existing box is rated to hold a fan, just take a look at the label! If you can’t find a label, err on the side of caution and get a new one. 

You’ll have to do a little bit of homework here to figure out what will work best for your project. Fan boxes are easiest to install if you have open access, like in the attic or an unfinished ceiling. If you won’t have easy access you may need to widen your drywall hole a little, but you can usually find a brace that will slip through the existing hole. 

Take a look at your rafters to determine the best way to install your fan box. Fan boxes can be attached directly to the rafter with a side bracket. If your new fan won’t be right next to a rafter, look for a brace that will span the space between two rafters. These braces can be a little trickier to install through a small hole in the ceiling, but they’ll give you a lot more breathing room when it comes to getting your fan box in the right place. 

5. Install the Mounting Bracket
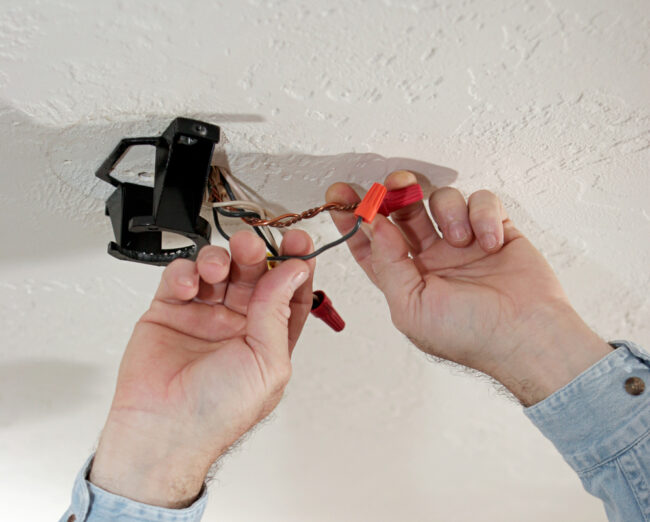
To secure the mounting bracket to the fan box, start by threading the wires through the mounting bracket. If the fan has a slide-on bracket, leave the bolts on the junction box, slide the bracket over the mounting hardware, and tighten the screws. For fans without a slide-on bracket, place the bracket over the mounting bolts that poke through the bracket. Then, secure it using the provided nuts. If your fan is a flush mount, pull the wiring through the canopy (the part that covers the wiring/mount bracket) and skip to step 7.

6. Install the Downrod
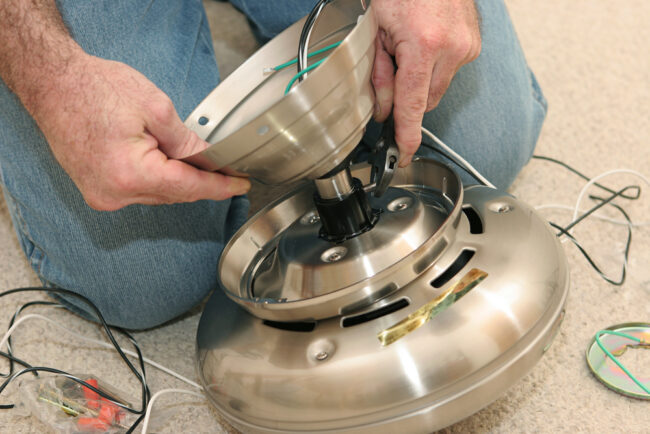
To set the downrod, you’ll want to find a flat work surface. Slip the canopy onto the downrod and pull the primary wires through the hollow downrod. Then, connect the downrod to the fan base. With the downrod and base assembled, attach the other end of the downrod to the mounting bracket. 

7. Wire the Fan
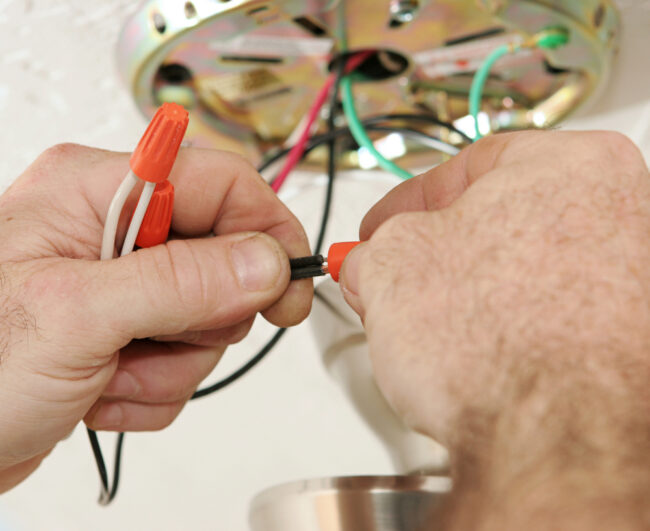
Next, it’s time to wire! Hang the downrod – or canopy, if you’re installing a flush mount fan – on the hook on the mounting bracket. If there isn’t a good place to hang it, phone a friend to hold the fan up for you to free up your hands while you connect the wires. 

Before you start, check to make sure all your wiring (and the wire nuts) will fit in the ceiling. Use your wire cutters to trim down any wires that won’t. This will also keep them from vibrating against the canopy when the fan is on. Use wire strippers to expose the copper of the wires on the new ends. 

Connect the corresponding wires using the provided wire nuts. Your installation guide will have a diagram to follow, but, generally speaking, the fan’s green wire connects to the ground wire, the fan’s black motor wire connects to the black supply wire, and the fan’s white wire connects to the white (or neutral) supply wire. 

Double-check your work against the diagram, then gently push the wires into the junction box. Lift the fan into position, then clip it to the mounting bracket and secure the screws.

Pro Tip: Some fans come with additional wires for extra features, like having a separate switch for the light and fan. If your switches or wires don’t match the diagram, you might need to check in with an electrician or a lighting specialist at our showroom to help you get things set up correctly.

8. Blades and Bulbs
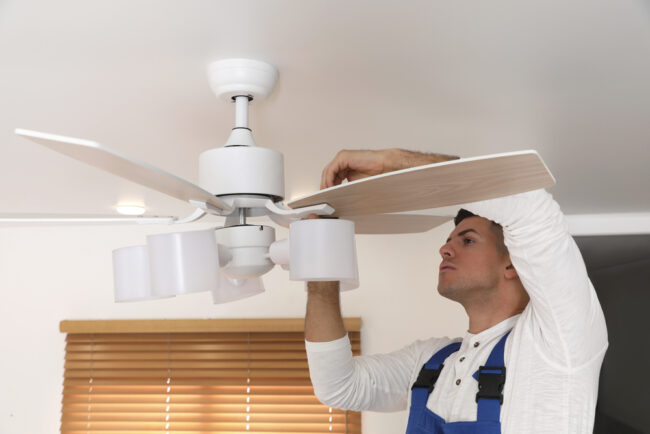
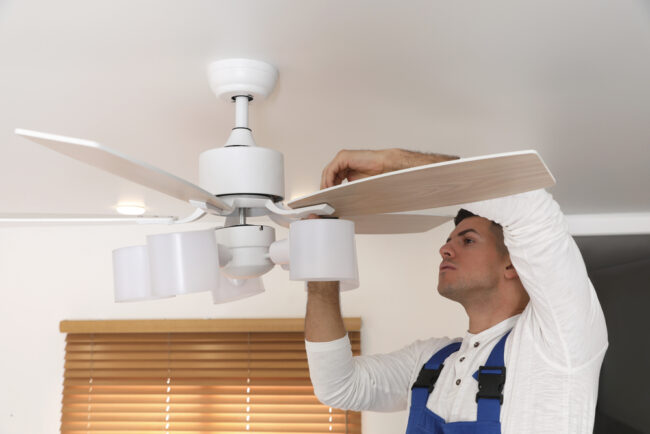
Now it’s time to install the fan blades. Every fan is a little bit different – but most fans will have an arm or bracket that you’ll need to attach to the blade and then to the base using a screwdriver. Some fans have quick-install blades that speed up the process using keyhole slots that slip over the fan’s mounting screws and lock into place with a little tug. 

Some fans have reversible blades – so make sure you’re checking each time that you have the correct side pointed down!

By now, you should be seeing the light at the end of the tunnel – so let’s install the bulbs! For fans with a light kit, refer to your guide to ensure everything goes in place correctly. Generally, you’ll just need to install the shades, globes, or light cover. If your fan did not come with bulbs, make sure the bulbs you install have the correct base type and wattage 

If your fan came with a remote, don’t forget to install the remote control holder!

9. Lights… Fan… Action!
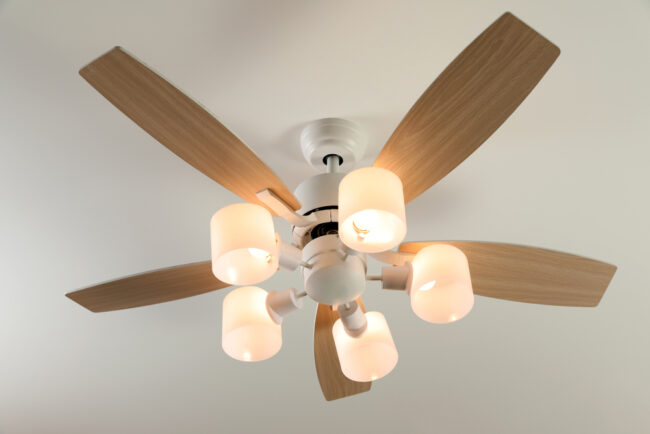
Last, but not least, it’s time to test out your new ceiling fan! Go back to your circuit breaker and turn the power back on. Try switching your fan and lights on and off using the light switch or remote control. Test all of the speed settings to make sure your fan is secured properly and doesn’t wobble or rattle.

Most of the time, installing a ceiling fan is a pretty straightforward DIY project. Occasionally, an odd issue can crop up due to things like old wiring. If you run into any trouble, be sure to give us a call right away, or call an electrician that can help you troubleshoot the issue.

—

Congratulations DIY master! Now that you’ve successfully installed your new ceiling fan, get ready for a fresh breeze to blow your way–and some savings too. With all that extra cash blowing around, come visit us and we’ll help get you started on your next project. 

—————————-

DISCLAIMER: Be sure to follow all the manufacturer’s installation instructions and take all recommended safety precautions. Check before installing to see if you need a permit and be sure all building and electrical codes are observed. If you have any questions or are unsure about installing the fan yourself, contact a licensed electrician or Western Chandelier for more help.
Filed Under: 2023, Ceiling Fans, Ceiling Lights, How to, Informational, Wellness & Safety

How to Fix a Noisy Ceiling Fan

How to Fix a Noisy Ceiling Fan

by admin · Feb 21, 2024

Ceiling fans can change your life – or at the very least your outlook on life – with just a flip of the switch on a hot, stuffy, muggy day. There’s something magical about the way they can change the entire way a room feels, making it comfortable in seconds. 

But what happens when this miracle-worker of a ceiling fixture starts affecting the ambiance in ways it shouldn’t? A noisy, squeaky ceiling fan will make the room it’s in unbearable no matter the temperature. If your noisy ceiling fan is making you miserable, it might be easier to fix than you realize. With just a little investigation and willingness to tinker, you could be on your way to cooler days ahead. 

There are a number of reasons your fan may be making more noise than it should – we’ll go over some of the most common issues and what you can do to bring back the peace and quiet.

1. Problem: Dirt

Just like every other surface of your home, your ceiling fan collects dust over time. This is especially true if your fan sits idle over the winter months, but even a fan that’s on 24/7 will get dirty over time. 

Take a damp rag and wipe down your ceiling fan, starting from the top. Be sure to wipe all sides and edges of the blades. If dirt was the culprit, you’ll notice right away that your fan is quieter once you’re done. 

2. Problem: Damaged Blades

Over time, some fan blades may warp. This is especially true for fans that have blades made of cheap composite materials, fans in humid environments, and extra-wide fans. Look at each blade from the side – each blade should be tilted at the same angle and lay flat. If you find a blade that is bent or wavy, it could be throwing off the balance of your fan, causing it to wobble.

If you can, carefully bend the blade back into shape. If it’s not fixable, you may be able to order a replacement blade from the manufacturer. 

3. Problem: Loose Parts

When your ceiling fan is in use there are a lot of moving parts, but if a part that shouldn’t be moving has come loose, you’ll hear a rattling sound. Thoroughly check your fan for loose screws. Common pieces that come loose include the canopy (the piece against the ceiling), the light kit (some fans may not have lights), and the fan blades.

Using a screwdriver, carefully tighten each screw you can find. Be careful not to over-tighten any screws, as it could damage your fan. If your fan has parts that snap into place, like a light cover, make sure those parts are seated properly. 

If you’ve checked all of the above and your fan still seems to be rattling or unstable, you may need to remove the canopy and double-check that the mounting screws attaching your fan to the ceiling are secure.

4. Problem: Grinding in the Motor

If the simple fixes above don’t resolve your noisy fan woes, it’s possible that the motor in your fan is running without sufficient oil. Ceiling fan motors and bearings need lubricant to run smoothly – without it, you may notice a sound that’s more like a buzz than a rattle. Each ceiling fan has different requirements for the proper way to add oil to the motor. We recommend checking your manufacturer’s user manual for specific instructions. 

If you’re not comfortable with taking your fan apart to get to the motor, this task might be a good place to bring in a professional.

Turning on your ceiling fan on a hot day should be a dream come true, not your worst nightmare. The good news is – most noisy ceiling fans can be fixed with nothing more than a thorough cleaning and a checkup with a screwdriver. In less than an hour you can be back to enjoying a blissful breeze in the comfort of your home.

If your fan is still making noise after you’ve checked for dirt, loose parts, and damaged blades, and oiled the motor, it might be time for a new, quality ceiling fan that can keep you cool for years to come. 

Before you go out and buy the first fan you see – stop by our showroom and ask around. Our lighting experts can help you find what you’re looking for, and we guarantee that our fans won’t start squeaking at the first sign of a heatwave!

Filed Under: 2023, Ceiling Fans, Ceilings Lights

How to Safely Replace A Ceiling Light

How to Safely Replace A Ceiling Light

by admin · Feb 14, 2024

Ceiling lights are a must-have feature in any room. Whether you don’t like the previous homeowner’s taste or you’re just ready for an update, ceiling lights can revitalize your home space. It may be even easier than you think–just follow these steps to safely switch out those old light fixtures for a new look.

What you’ll need:

  • Screwdriver
  • Step ladder
  • Voltage detector 

You may also need:

  • Wire cutters
  • Wire strippers
  • Pliers
  • Painter’s tape
  • An extra set of hands 

Part 1: Remove Old Fixture

Step 1: Turn off power

Shutting off the electricity is important to your safety. Locate the switchboard for the room you are working in and flip the switch. If you’re not sure where the switchboard is, check the basement or garage. It might also be in the front of the house or near the entrance.

Once you’ve flipped the switch for the room with the ceiling light, go back into the room and flip the switch a few times to make sure the power is off. Then, leave the light switch in the off position. Make sure you lock the circuit box or leave a note indicating that you are working. 

Step 2: Remove cover and bulbs

Use a stable step ladder to reach your ceiling light. Hold the cover, or the visible, outside piece of the light fixture, in place with one hand. Loosen the screws with a screwdriver in the other. (For heavy or large fixtures, it’s best to have someone else hold on while you work on the screws.

Once the cover is removed, unscrew the light bulbs and set them aside.

Step 3: Lower the fixture base

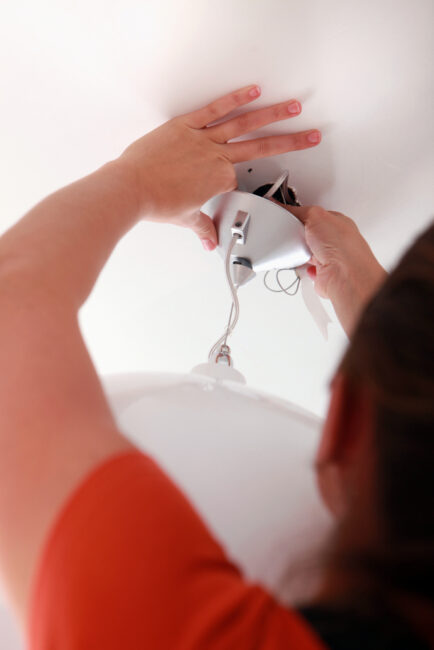
With the cover removed, you will be able to see the base–the part of the light fixture that attaches directly to the ceiling. Typically, the base will have tabs or nuts and screws securing it. Loosen the nuts or screws, then lower the base to access the wiring (In the rare case you’re unable to find the screws, search for the installation manual online. You can also take a picture of your base and bring it into our showroom – we’ll take a look and help you figure it out!)

Until you have disconnected the wiring, you will want to lower the base but not remove it completely—an easy way to do this is by securing it with painter’s tape or having someone else hold it in place.

Step 4: Disconnect the wires

Once you have uncovered the space behind the old light fixture, there should be a junction box where wires are connected and stored. Start by removing the caps or tape covering the wire connections. The caps will come off when twisted counterclockwise.

 Pro Tip: Take a picture beforehand so you can remember exactly how everything was put together. 

Part 2: Connect the Wiring

Step 1: Test voltage

Test each exposed wire by touching it with the tip of your voltage detector. 

If the voltage detector lights up, there is a current running through, and the wire is unsafe to touch. Double-check your circuit box and ensure the switch is still flipped. 

Once you’re sure there is no electrical current, you are safe to continue working with the wires.

Untangle the wires and detach the fixture from the ceiling completely. Either hand off to someone below or carefully carry it down the ladder.

Step 2: Check wires

Frayed wires can be hazardous -if there is any fraying on the end of the wires, trim them down with wire cutters. Then, strip off any insulation on the outside with wire strippers. You only need to strip about ½ inch of insulation for the wire connection.

Pro Tip: Check your new fixture’s installation recommendations carefully. If you’re installing a heavy fixture such as a ceiling fan or chandelier, you may also need to install an additional support in the ceiling. 

Step 3: Match and Attach

Electrical wires are color-coded. Black or red are hot wires, white is neutral, and green or bare copper are ground wires. A grounding wire sometimes connects to a grounding screw instead of another wire. Look for a matching wire in your ceiling for each wire in your fixture.

Twist together each matching wire. Either by hand or with pliers, hold the exposed ends side by side with one hand and twist with the other. (This is where your picture of the original fixture’s wiring comes in handy.)

Now that the wires are connected, it’s important to cover the exposed ends again. Screw the wire caps on by twisting clockwise over the connected ends until they hold the wires tightly in place. If your original fixture didn’t have wire caps, you can use electrical tape as well.

Make sure to check the owner’s manual for specific instructions—for example, you might have an extra red wire that connects to a black wire. If you don’t have any instructions, generally you will be fine with just matching the correct wire colors.

Part 3: Install New Fixture

Step 1: Replace junction box

With all your wiring safe and sound, the junction box is ready to be put back into place. Tighten the screws securely against the bracket until  Fold the wires up into the box so they will be hidden behind the ceiling light.

Step 2: Attach new fixture

There are several different ways your new light fixture base could attach to the ceiling—these are the most common ways. As always, check the owner’s manual for anything specific or unique about your light.

Securely attach the light base by positioning it over the mounting screws. Place a metal nut on each screw and twist by hand until they are tightly holding the base in place.

If the fixture has a mounting bracket, connect the mounting bracket to the junction box first, then hang the base over the screws.

If it’s a keyhole shape, adjust the base so the screws slide into the smaller grooves and then tighten the screws with a screwdriver until they are holding the base securely.

Step 3: Install light bulbs

Now that your base is set, it’s time to add the light bulbs. Make sure you have the correct wattage—the fixture typically indicates its maximum wattage on the package or owner’s manual. 

When choosing which bulbs to use, the lower the wattage the safer. Most light fixtures are safe with up to 60 watt incandescent bulbs. You may also want to consider more eco-friendly choices, such as CFL or LED bulbs. These options have lower wattage but produce the same amount of lighting, saving you money on electricity in the long run.  

Test the bulbs by turning the electricity back on—flip the switch on the circuit breaker then turn on the room light switch. If it is flickering, dim, or not turning on at all, turn the electricity off again and check everything—look for loose connections or mismatched wires. If your lights are bright and solid, you are ready for the final step.

Step 5: Attach cover

Flip the light switch and circuit breaker back off before installing anything else. Take your light fixture’s shade, cover, or top and climb back up the ladder. Attach it to the base by twisting screws or attaching pieces until everything is tight and secure. If it’s a hanging light, make sure it’s at the proper height before finishing your work. Every light has different connecting components, so check your owner’s manual and just make sure it’s snug.

And there you have it, your guide for installing a new, updated ceiling light. Now that you know how to install it, make sure to visit our showroom to choose the perfect fixture for your ceiling!

Filed Under: 2023, Buying Guides, Ceiling Lights, Styles and Trends, Wellness & Safety

Does Your Rental Have Bad Lighting? – 5 Top Lighting Complaints (and Solutions) for Renters

Does Your Rental Have Bad Lighting? – 5 Top Lighting Complaints (and Solutions) for Renters

by admin · Feb 7, 2024

Renting an apartment or house is a great way to maintain flexibility and save up for future investments. But making the space your own can be challenging– especially if it’s a long-term rental. Many renters don’t feel that changing up their rental lighting is an option for them – but taking control of your lighting (in a renter-friendly way) is actually one of the best ways to make your rental feel like home.

The basic lighting in rentals isn’t always ideal, and bad lighting can really make your home feel… off. So we’ve come up with five of the top complaints from renters that we hear all the time – and we’ll follow them all up with renter-friendly solutions to make your space a cozy, personalized home for as long as you live there.


“My rental feels cold and sterile.”

Lighting has a massive impact on the way our room feels, and on how we feel when we’re in it. Aside from throwing out a rug and hanging some art, tweaking the lighting can also make a room feel more warm and less sterile.

What to try:

  • Use textured lamp shades to create depth, color, and coziness.
  • Swap out mismatched and too-bright bulbs for warmer colored bulbs. 
  • Add battery powered string or LED accent lights to light dark corners and to create a softer lighting environment for the evening wind down.


Not sure where to start? Check out your local lighting showroom for expert advice and a wide variety of light fixtures!


“There isn’t enough light in my apartment.”

A lack of adequate lighting can make any space feel tired and dull, and it’s hard to get anything done in the dark. Adding more light sources is a great way to improve the homey feel – plus, it’s really easy!

What to try:

  • Aim for 5-7 light sources per room, including existing lights and windows. Lamps are a renter’s best friend! 
  • Make the most of natural lighting by using sheer privacy curtains, light paint colors, and mirrors.
  • Use the best light bulbs for your needs. LED bulbs can give off a lot more light than traditional bulbs, so they’re a great option for a quick light boost.


Simply having enough light is one of the easiest and most powerful tools to make your space feel like your home.


“My light fixtures are outdated/don’t match my aesthetic.”

It’s pretty common for rentals to have either original (outdated) or builder-grade (basic) light fixtures. Installing new custom lighting isn’t often an option, but it doesn’t hurt to ask! Some landlords will be fine with updating their lighting, especially if you remind them that it will increase their property value.

What to try:

  • Always consult your lease and your landlord before making permanent changes to your rental.
  • Before you start, make sure that your new fixture will work with the existing wiring and switches.
  • Switching a light fixture is a pretty simple DIY in most cases! Check out this Youtube tutorial for a typical DIY ceiling fan replacement.


Investing in a new fixture as a renter is a smart move if you plan to stay long-term. Great lighting completely changes the feel of a room – consider it an investment on your comfort! (Every lease is different – you may even find that you’re fine to replace the light so long as you switch it back upon moving out, so you can take it with your to your next place!)


“I can’t install new wired lighting, so I’m stuck with what came with the rental.”

Many renters feel creatively limited with their lighting options. If your rental had cruddy lighting and you’re not allowed to touch it –  it may feel like you’re stuck. But the good news is – there are a LOT of lighting options available now that don’t require hardwiring anything, and many can be installed without drilling any holes!

What to try:

  • Battery-powered sconces and LED strips add a lot of personality. They often need to be screwed to the wall.
  • Hate changing batteries? These also come in corded varieties, so you can plug-in sconces, lamps, and LED strips anywhere you need.
  • Turn a hardwired fixture you love into a battery-operated one with and LED puck in place of the bulb!


These options can help you elevate your apartment without creating permanent changes – and you’ll get to sell them or take them with you when you go.


“I don’t know what to look for when shopping for a light fixture.”

Light fixtures significantly impact your home, but they’re not something you shop for very often. While an endless number of online options can seem like a good thing, it can often lead to uncertainty. 

How do I know what style to shop for? What does the fixture look like in person? Is it well-made, or will it fall apart in 3 months? Are there hidden costs not shown in the listed price? Can I install it?

What to try:

  • Check out Pinterest, interior design social media accounts, and design magazines to get an idea of what your space needs. Create a mood board from these ideas to narrow down your style!
  • Visit your local lighting showroom with pictures of your space and your inspirational photos to get customized help.

‘

—

If you’re not sure what you want or where to start, it’s easy to get lost in a search filters nightmare. Find inspiration, then skip the hours of hunting and go to a showroom. 
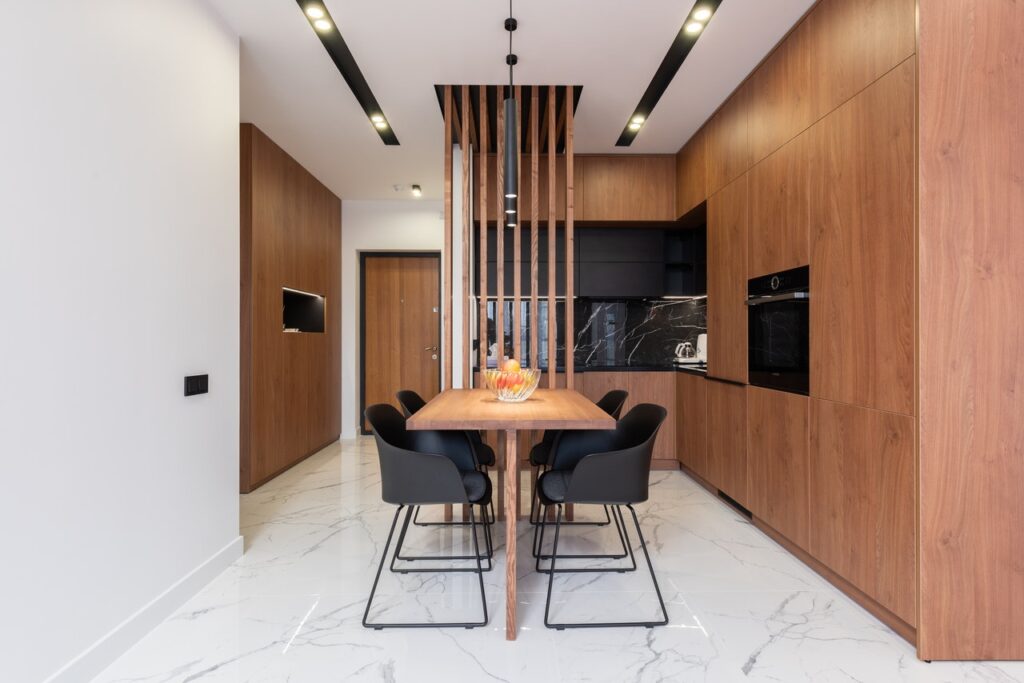
Lighting showrooms specialize in making your home feel its best with great lighting. You’ll get better advice and find what you need faster. Plus, showrooms vet their products – so you won’t end up with a dud that breaks 3 days after the return window. 

It can be challenging to nail balanced brightness, renter restrictions, and a budget! If the lighting in your rental just isn’t cutting it, skip the headache and stop by our showroom. We’ll help you turn up the lights!

Filed Under: 2023, Styles & Trends

How Many Light Bulbs Do You Need? Understanding Lumens

How Many Light Bulbs Do You Need? Understanding Lumens

by admin · Jan 31, 2024

Are you updating your light bulbs, but not sure how bright you need them? Or how many bulbs your room needs?

You’re not alone in the confusion. It can be difficult reading the package in the hardware store and understanding what the bulb will do for your home. 

This post will briefly touch on how lumens work and then guide you on how to make sure you have the right light for each room in your house.

What Are Lumens?

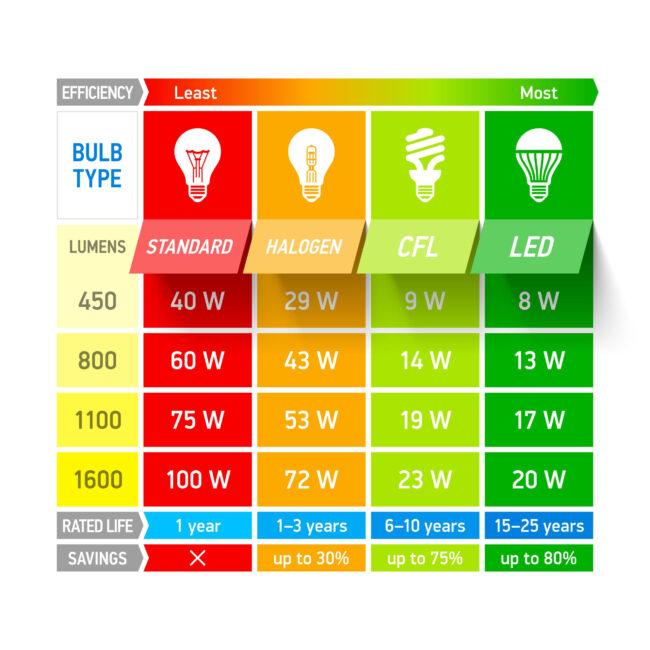
With major innovations in lighting over the past twenty years, bulbs have become much more efficient. That’s great news for your electric bill and the environment! But a side effect is that watts are no longer a good measurement for brightness. 

Watts measure the amount of energy used by the bulb. When all bulbs were incandescent, this also indicated brightness– the higher the watts, the more energy used, the brighter the bulb. 

But with more efficient bulbs, like halogens and LEDs, much less power is used while still producing bright light. So a 40 watt incandescent light gives off the same light as an 8 watt LED! 

So how will shoppers know that an 8 watt LED will replace their 40 watt incandescent? Instead of measuring power use, lumens measure brightness. Now no matter the energy efficiency, you can compare bulbs apples to apples. 

How Many Lumens Do I Need?

So how many lumens do you need for your space? To calculate the right lumen range, you need to know the square feet of the space and the proper foot candles for the area. 

The square footage of your room will help you know how much light you need– the bigger the space, the more light you need. To find out your square footage, simply measure the length and width of the room, then multiply those two numbers. 

For example, if your room is 10 feet by 12 feet, your room is 120 square feet (10×12=120). 

“Foot candle” is a less familiar term, but it means the brightness of a light source from one foot away. The target foot candle range will depend on the activity of the room. For workspaces like kitchens and offices you’ll want more light (more foot candles), and for bedrooms and dining rooms you’ll want less light (fewer foot candles). 

Once you have the square feet of your room and the target foot candles, then you can determine how many lumens you need. Simply multiply your square feet by the desired foot candles!

Let’s say that your bedroom is 120 square feet. Multiply 120 by 10 for the low end and by 20 for the high end of the target zone. 

120 x 10 = 1200

120 X 20 = 2400

Now you know that you need between 1200 and 2400 lumens for your bedroom!

Simple Cheat Sheet

If you don’t want to worry about foot candles, here’s a chart with a general estimate of how many lumens you need per square foot per area of your home. Remember, these calculations help determine the total light a room needs. But you’ll often concentrate light above tables, countertops, or a desk.

So if your living room is 15 feet by 20 feet, your total square footage is 300 (15 x 20 = 300). Then multiply that by the recommended 10 lumens to get a minimum of 3,000 lumens for your living room (300 x 10= 3,000). 

How Many Bulbs Do I Need?

It may seem overwhelming to need a few thousand lumens for your room. Don’t worry– you will still use relatively few bulbs to get all the light you need. For reference, an 8 w LED bulb will give off about 450 lumens of light. 

With just a few bulbs, you’ll have all your lighting covered. Put three in the ceiling fan, add a lamp with one bulb, and you’re done!

Need Help?

Proper lighting is essential to a fully functioning home– but it can be challenging to nail balanced brightness, great fixtures, and a budget! Contact the experts at Western Chandelier for advice on your projec

Filed Under: 2023, Bulbs, Buying Guides, Informational, Light Bulbs

How to Choose Timeless Light Fixtures in 6 Easy Steps

How to Choose Timeless Light Fixtures in 6 Easy Steps

by admin · Jan 24, 2024

Fads come and go. And while there’s nothing wrong with jumping on an interior design trend you love, we all do it knowing that it won’t be in style forever. Timeless design styles are so named because they don’t look “stuck in a time” – making them excellent choices for spaces you don’t want to redecorate every few months.

With that said, making your home’s style timeless is sometimes easier said than done. We realize we may be a bit biased, but we firmly believe that the key to any good room design is lighting. Whether you love the thrill of redecorating every few months or would rather have a classic room that meets your needs through it all – a timeless light fixture can really help to tie your room together without clashing with your design choices. But that doesn’t mean it has to be boring! 

Finding timeless fixtures may take a little more effort, but it’s worth it to have a piece that will last you for years to come. To help you get started, we’ve put together a step-by-step guide to help you find a timeless fixture that’s right for you.

1. Find Inspiration 

Finding a style that is timeless is sometimes more about finding a style that is timeless to you. Take a minute and think about the decor styles you have admired over the years. Have you always been drawn to a sleek modern look, or do you prefer cozy cottage-like interiors? Are you more of a maximalist or a minimalist?

If you’re not sure, you may want to start by browsing for inspiration. Magazines, social media, and Pinterest are great places to search for ideas. Another source of inspiration could be your favorite old movie or TV series!

For example, the kitchen in the film Father of The Bride (1991) is iconic for its warm, moody lighting. The style is so timeless that the film director, Nancy Meyers, has replicated this look and lighting design in many of her movies. Even Meyer’s own kitchen rocks this lighting look.

Once you have a collection of your favorite images saved, go back and look at the light fixtures. What colors are they? What shapes are they? Where are they in the room? You’ll start noticing patterns that you can use to create a list that will define your style.

2. Think Long Term 

Now that you have defined your style, you will want to be sure you can live with it long term. Take your list, and consider how these timeless tips can apply to your style:

Colors and Finishes: Neutral colors and metallics are always in style, but you’ll want to choose finishes that are consistent with your personal style. Neutral colors like white, black, beige, grey, and tan are safe bets, and satin nickel and chrome are usually safe bets. 

Swappable Parts: Consider finding lights that have shades that can be traded out without replacing the whole fixture. Glass shades come in many shapes and styles (clear glass is in style more often than frosted glass). Fabric shades are another easy swap out – stick to neutral or earth-tone colors for a more timeless look.

Permanence: Ceiling and hardwired wall fixtures can be a hassle to replace. Consider going classic and neutral with your permanent fixtures, then have fun with plug-in lights like a lamp that can be easily moved or replaced when it’s out of style.

3. Consider the Quality 

The key to designing a home that has timeless style is creating a sense of comfort and luxury. 

When choosing a fixture, follow this axiom: buy once and buy well. While top-quality light fixtures cost more upfront, they last much longer. If you don’t want to be reinstalling new lights every few years, don’t forget to budget for quality fixtures.

You also need to consider the quality of the light itself in your space. A single fixture in the center of a room’s ceiling isn’t enough – you’ll need to create layers of light to make your room feel comfortable. Every room should have a good mix of light sources, including overhead, accent, and task lighting. 

4. Classic Staples, Trendy Extras 

It can be pretty difficult to look beyond the latest trends in interior design. But, like your wardrobe, fast fashion items are usually cheap and go quickly out of style. 

Think of your light fixtures as your wardrobe staples – the little black dress, the tailored suit, and so on. Your staples look great, are tailored to you, and never go out of style. Your accessories are your trendy pieces. When a trend comes through that you love, resist the temptation to replace your staples! Buy accessories in that style that compliment your staples instead. 

For example, bold, sculptural decor is on-trend right now. While that sculpted brass chandelier is beautiful, it won’t be in style forever… and you’d end up having to replace it again soon when it inevitably feels tired. A timeless ceiling fixture will keep your room anchored, giving you room to play with this style on a smaller scale with accessories like a lamp or vase.

5.  It’s Okay to Take Risks 

Just because you are creating a timeless style for your home doesn’t mean you can’t take risks. The trick is knowing where and how to take risks. 

Don’t be afraid to play with scale – a large, statement fixture can be just as timeless as any smaller counterpart as long as it compliments your style long-term! A great place for a timeless jaw-dropper is over the dining room table – it’s a bold choice that pays off! 

Pro Tip: It may seem counterintuitive, but some of the best rooms to experiment with your design style are the smallest rooms in the house. If you fall in love with a trendy fixture, you don’t have to say “no” to keep your timeless design intact! Consider putting it in a powder room, hallway, or other small space that’s easier to redesign when the fad has faded.

6. Consistency is Key 

Timeless looks feel easy and balanced. Choose fixtures that complement each other and your home’s decor to keep your design cohesive. Consider the other details in your home and look for fixtures with similar finishes and/or shapes. 

Pro Tip: Our eyes are naturally drawn to symmetry. Try doubling up on your ceiling lights or table lamps to create symmetry in your home’s lightscape. We love how the symmetrical lighting design in the kitchen below gives it an elevated and polished look.

The lighting options you choose will have a significant impact on the way your home feels, so make the most of your investment! Take some time and get to know your own personal style, then find timeless options that will work for you! 

——————-

If you want help finding a timeless fixture that’s perfect for your home, give the lighting experts at Western Chandelier a call! We have a vast range of styles to choose from, and we have years of experience in helping homeowners find exactly what they’re looking for.

Filed Under: 2022, How to, Styles & Trends

9 Surprising Ways to Glow Up Your Home Exterior (Literally)

9 Surprising Ways to Glow Up Your Home Exterior (Literally)

by admin · Jan 17, 2024

Most neighborhoods look the same when you drive at night. Because no matter what makes homes unique during the day, they almost all only use a porch light or two at night. But your home doesn’t have to lose its character and statement features just because the sun went down!

You may be surprised that there are at least nine ways to light your home’s exterior. We’ll dive into expert tips to unlock the unexpected for your evening curb appeal and outdoor activities. From increasing safety to creating drama to inspiring luxury, mix and match these lighting methods to customize an unforgettable “evening look.”

1. Accent Lighting

Accent lighting uses light to draw attention to a feature of your home or garden. In fact, any of the following eight lighting techniques can be used as accent lighting! For example, try using a spotlight to show off a flagpole, up-lighting on a few trees to increase their impact, or silhouette shrubbery for subtle mystery.

A tip from the experts: Trying to figure out what to accent on your home exterior? Make a list of your favorite things about your front yard (or what you’d like to add to your yard).

2. Down-lighting

Want to increase visibility for outdoor activities? Try down-lighting! This lighting technique positions the light source up high with a shade that concentrates the light towards the ground. The bright light makes evening play safer and keeps the party going after sundown.

A tip from the experts: Trees are a great place to nestle down-lighting sources with finesse.

3. Highlighting

You’ve likely seen yards in a fancy neighborhood that look like their trees are glowing somehow. They’re probably being highlighted! By shining a spotlight or two from the base of a tree or other feature, the light will reflect only off the object. This concentrated glow makes the object look like it is lit from the inside!

A tip from the experts: Highlight is a simple way to immediately make your home look upscale and luxurious.

4. Moonlighting

Are you looking for more magic and romance in your outdoor space? Then try out moonlighting! Like down-lighting, moonlighting uses a high-up light source to concentrate light downwards. However, this method uses more subtle sources and dimmer light– mimicking the softness and mystery of a full moon!

A tip from the experts: Moonlighting is most effective in backyards and wooded areas, where the soft light can trickle down through the leaves.

5. Silhouetting

Silhouetting is the opposite of highlighting, but its effect is equally dramatic. Instead of lighting the feature itself, you can use the light source behind a tree and the wall. This will shine the light on the wall and cast the tree or other features into shadow. So you’ll get the soft shape of your feature, giving impact in a subtle way.

A tip from the experts: Make sure to angle the light towards the wall to create the greatest effect!

6. Shadowing

Want to spread the beautiful pattern of your tree leaves against your home? Then shadowing is the perfect technique for you! Shadowing combines highlighting with silhouetting for a completely new effect.

Like silhouetting, you’ll position your light source towards a wall behind the tree. But, like highlighting, you’ll put the light in front of your tree. As a result, you’ll cast a dramatic shadow of your tree against your home while clearly illuminating the trunk.

A tip from the experts: This works best with tall, leafy trees for an enchanting summer evening. The bare branches will look stunning in the winter too!

7. Path-lighting

Upgrade the magic and safety of your front walk or garden path with path-lighting! Solar lights are easy to install and come in endless designs and colors. Not only will path lights make your home safer, but you’ll get to enjoy your plants and landscaping around the clock.

A tip from the experts: Space your path lights 5 to 10 feet apart, depending on the lamp’s brightness.

8. Up-lighting

Want to add drama with a contoured view of your home? Up-lighting uses spotlights to throw light upwards on your home exterior. You’ll work with the natural layers of your home to create interest and luxury. Even in a cookie-cutter development neighborhood, your home will stand apart!

A tip from the experts:  Try staggering these lights along the ground level and roofline to maximize the impact of your home’s features.

9. Wall-washing

Our final lighting tip brings us to wall-washing. This method uses focused ambient lighting to cast even light across an entire wall. Instead of the dramatic shadowing created by up-lighting, you’ll get a clear picture of the garden or home wall without harsh light.

A tip from the experts: The key to great wall-washing is placing the light source at a wide enough angle. Hide the source in low foliage for added mystery.

Need Help?

Proper lighting is essential to a fully functioning home– but it can be challenging to nail balanced brightness, great fixtures, and a budget! Contact the experts at Western Chandelier for advice on your project!

Filed Under: 2023, Outdoor Lights, Styles & Trends

« Previous Page
Next Page »

Copyright © 2025